NASA / JPL Ops Lab

NASA JPL's OpsLab came to our User Experience class to workshop a UX problem in augmented reality

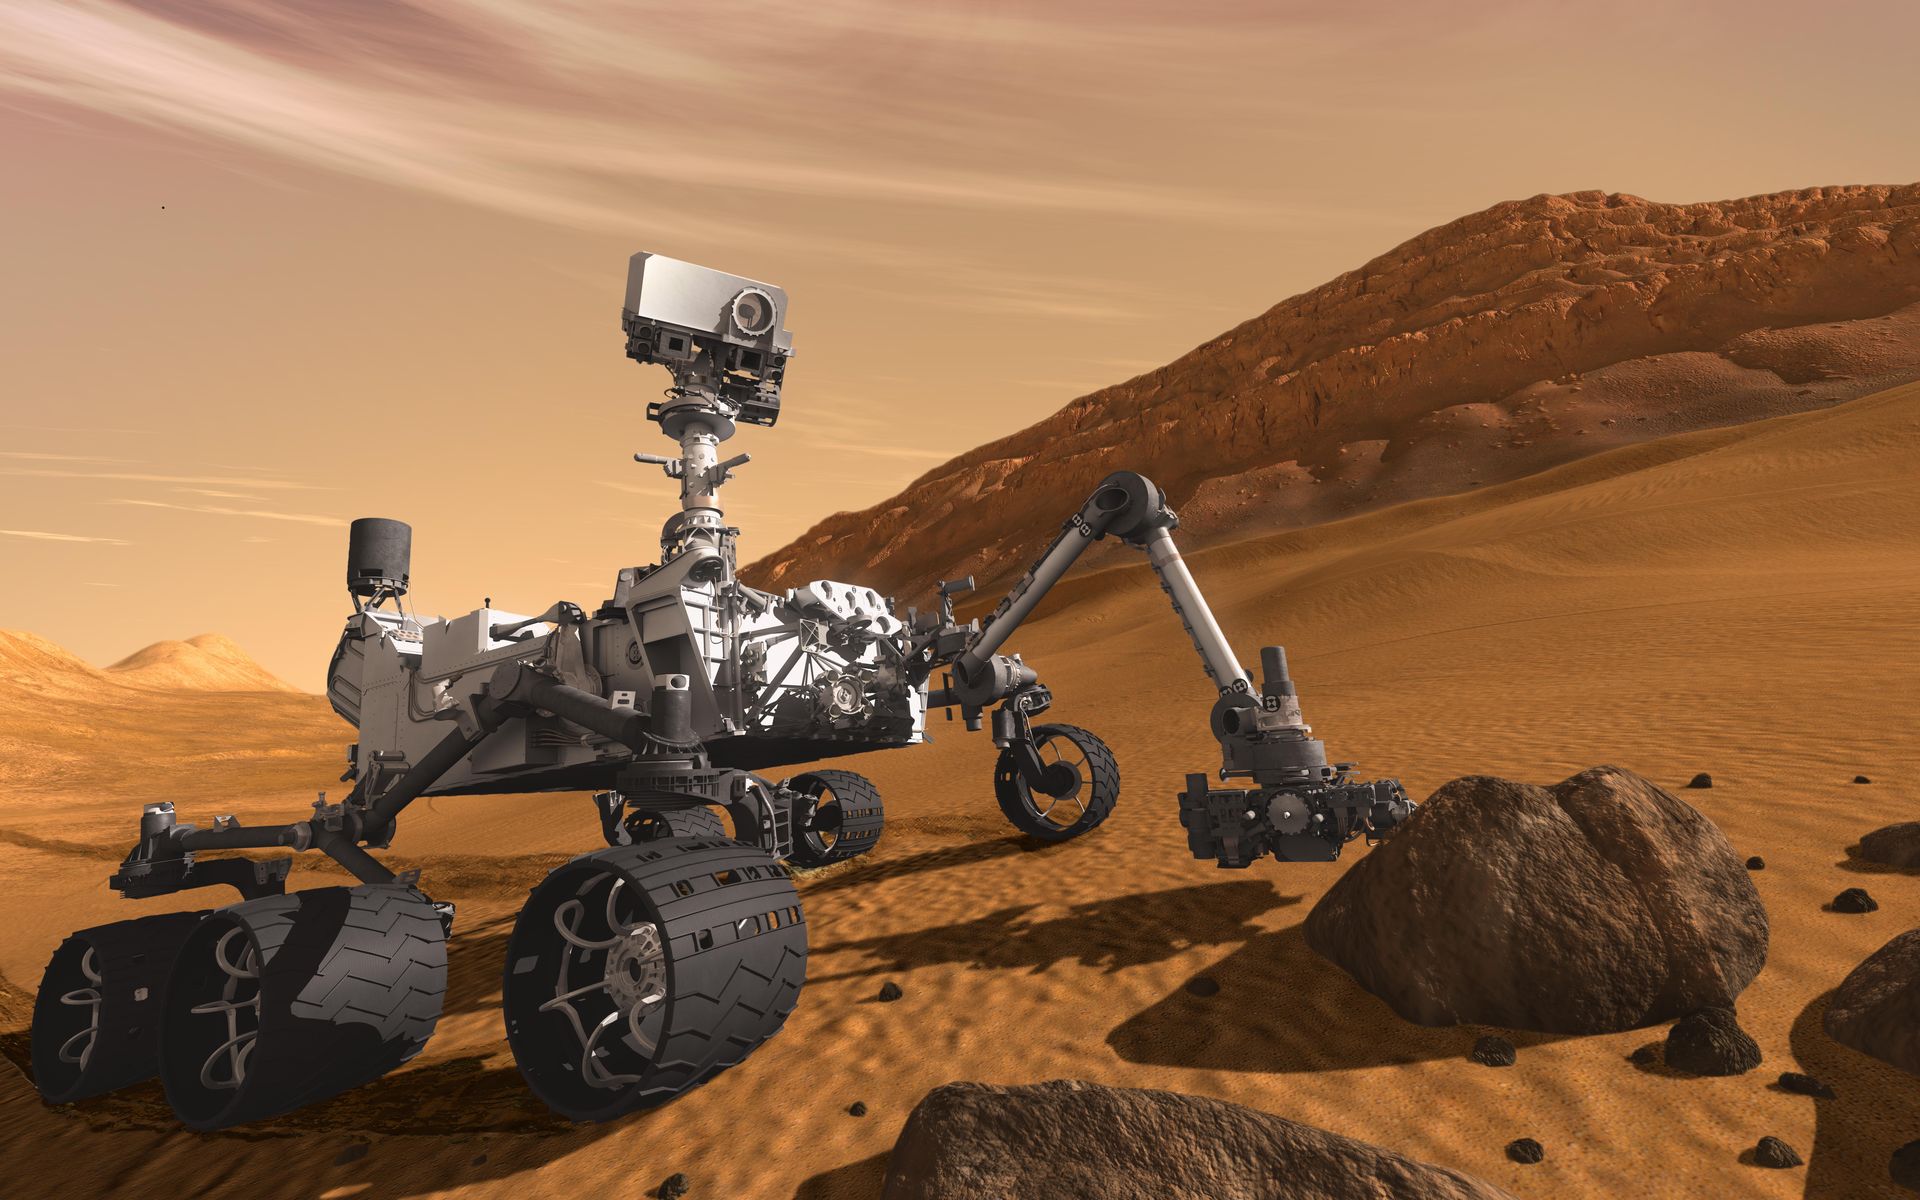
Demonstration of Augmented and Mixed Reality used by NASA
Credit: NASA
User experience design in augmented reality and simulated spaces become more relevant as these emerging technologies become more integrated into our systems. NASA's JPL Ops Lab came to our User Experience Course at New York University to workshop a UX problem dealing with the interface used by scientists at NASA in Microsoft's HoloLens.
Project Overview
The current experiential state of using the HoloLens is the following:
- When you are wearing the HoloLens you have a small field of view (FOV)
- You can only see so much of the augmented models because of their size (ex. the Mars Rover is the size of a car) and the limitation of the FOV (the field of view is about the size of an index card)
- When you select objects, it is difficult to know the relationship between the object you have selected to the rest of the CAD hierarchy
- There is no elegant way to jump between hierarchies or select more than one object at a time independent of another user on a computer
- The interactions of the HoloLens is mostly limited to minimal variations of air-tapping
Our challenge was to design a way for users to navigate through CAD model file hierarchy in augmented reality comfortably and independently.
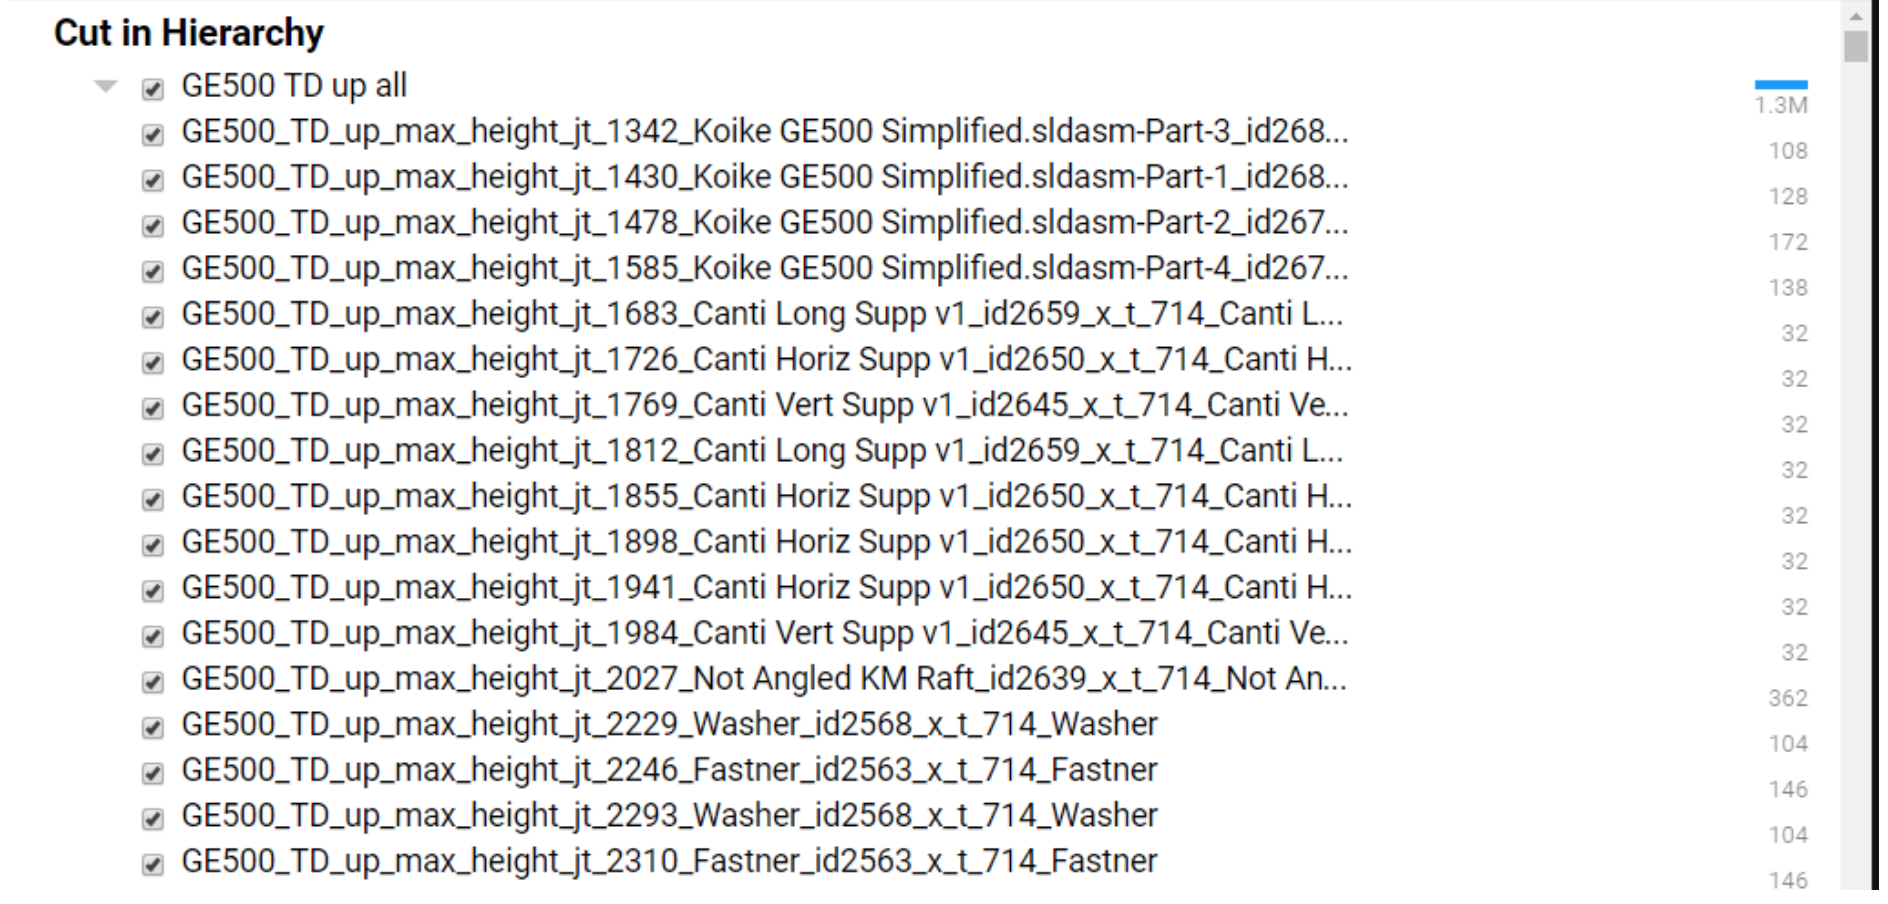
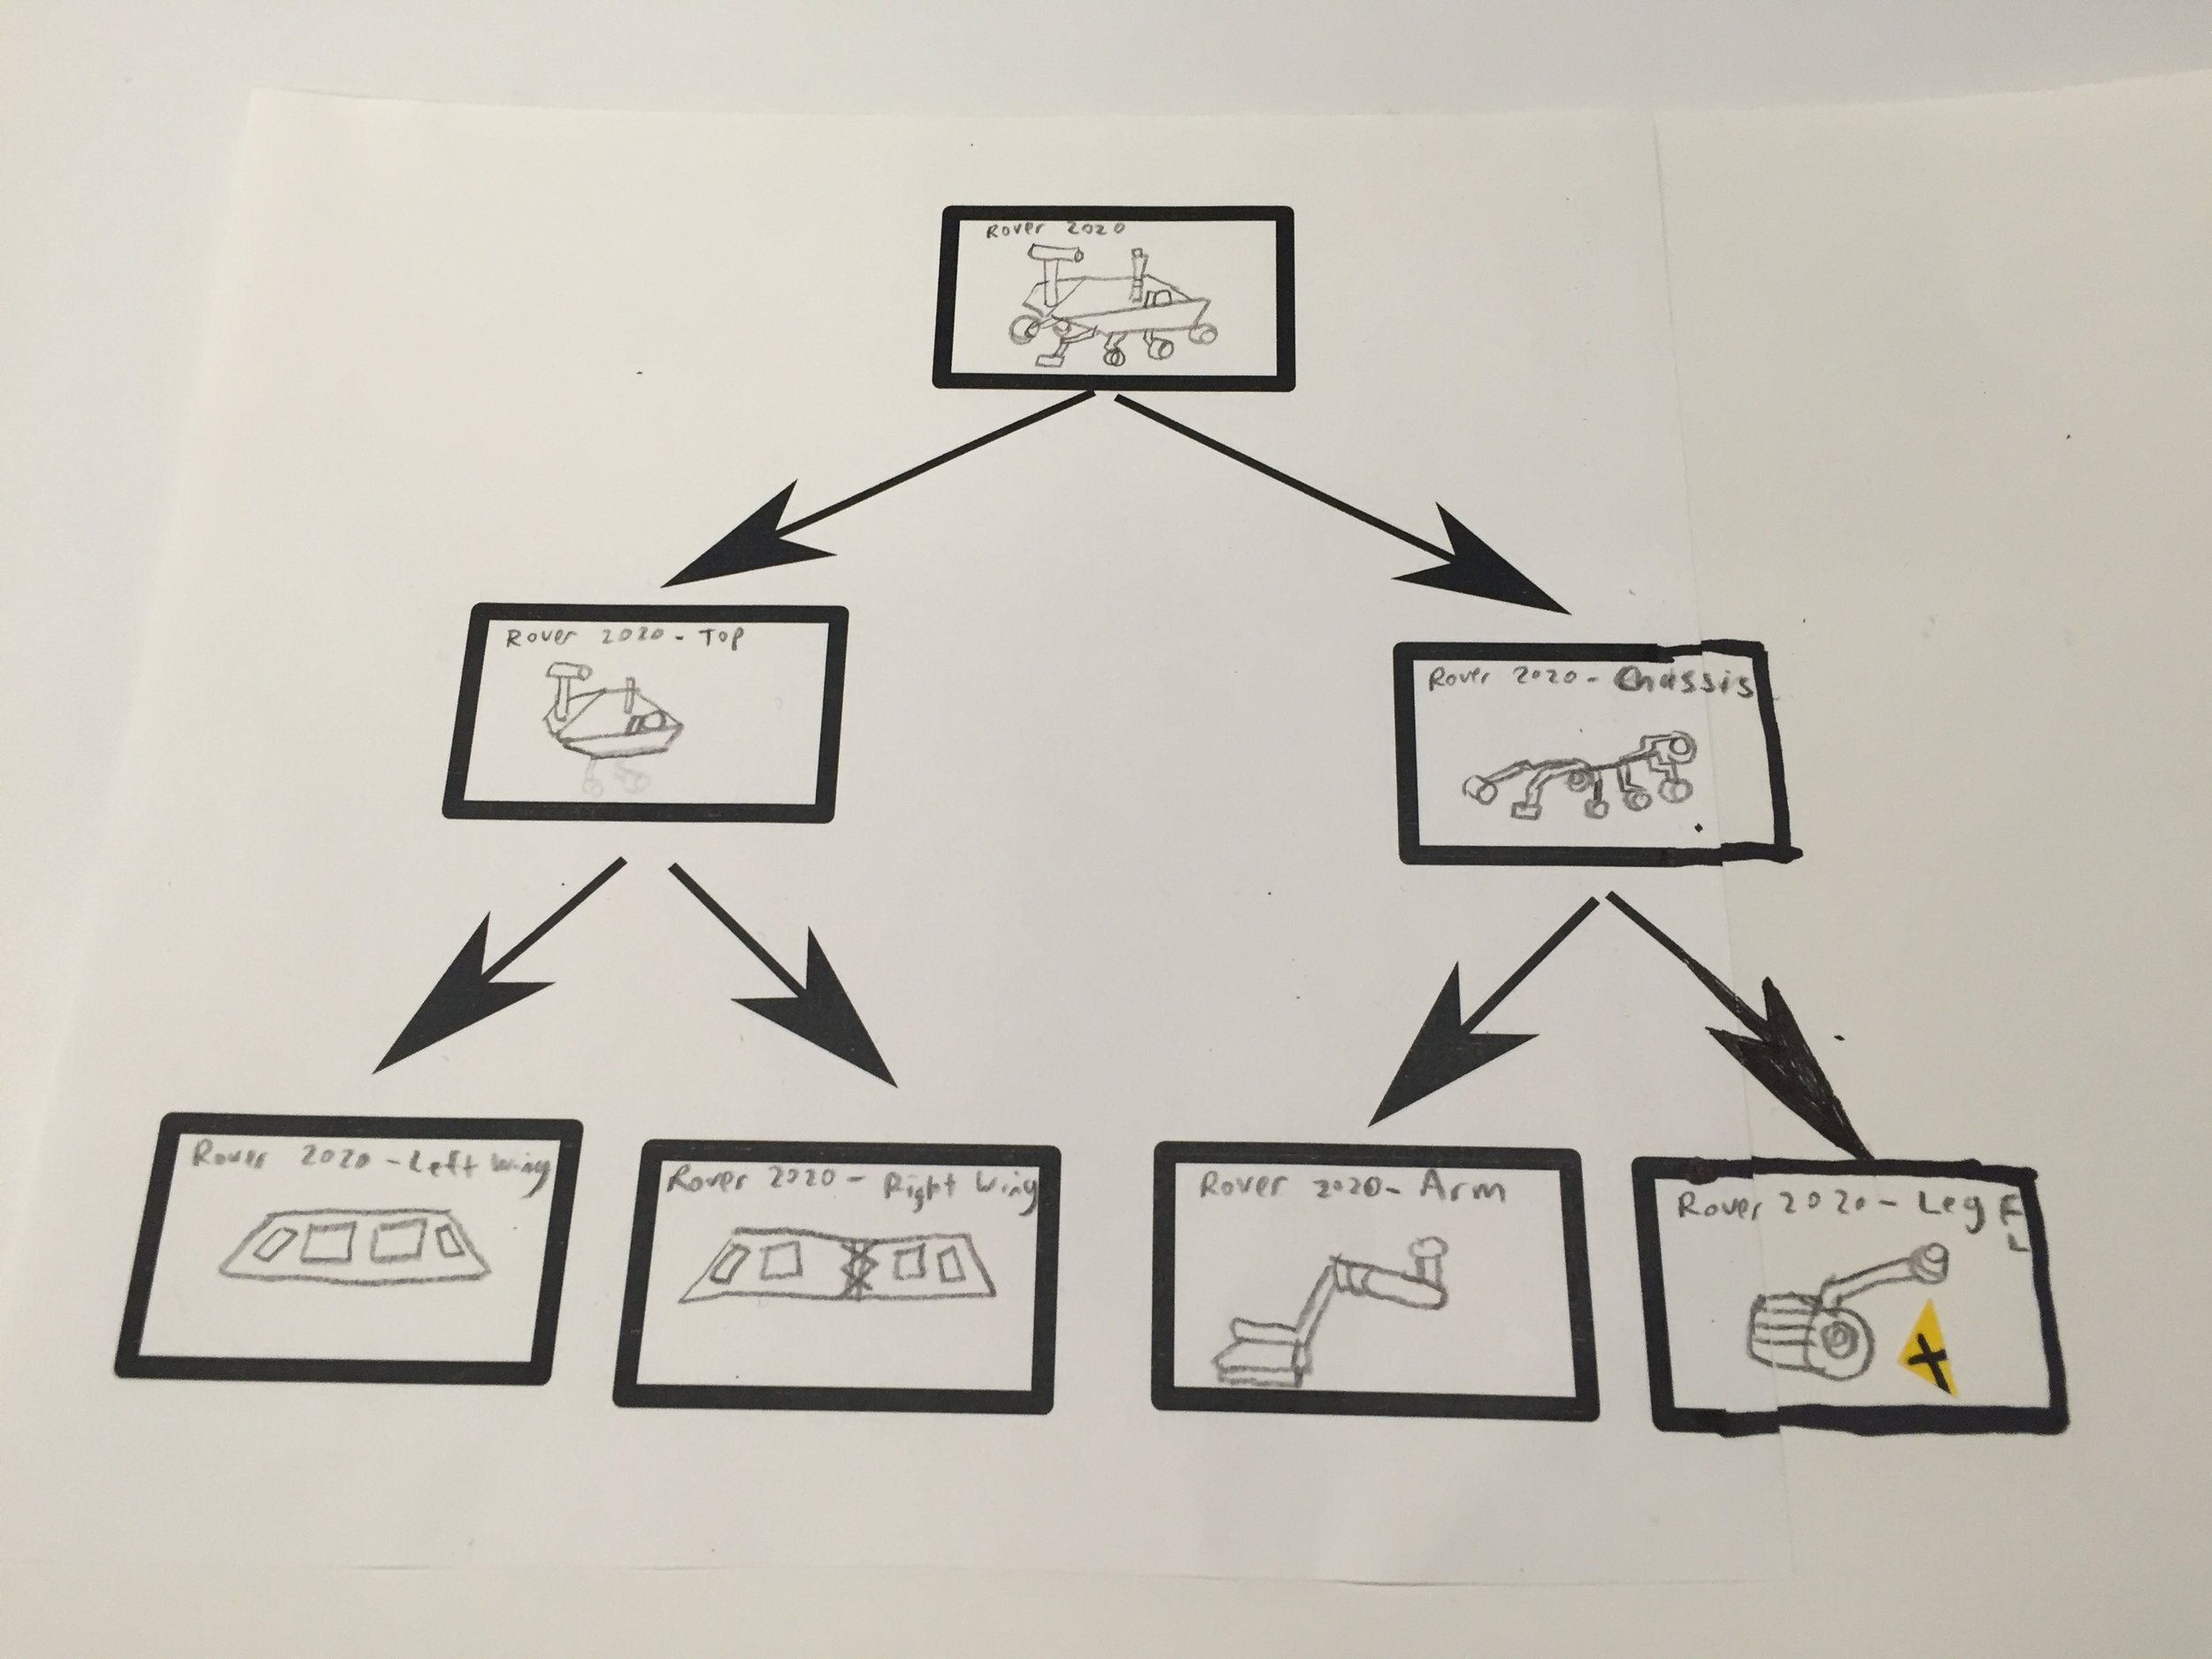
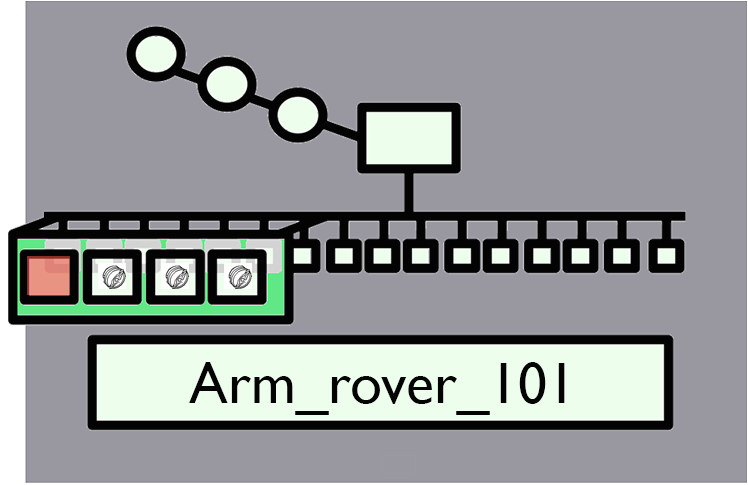
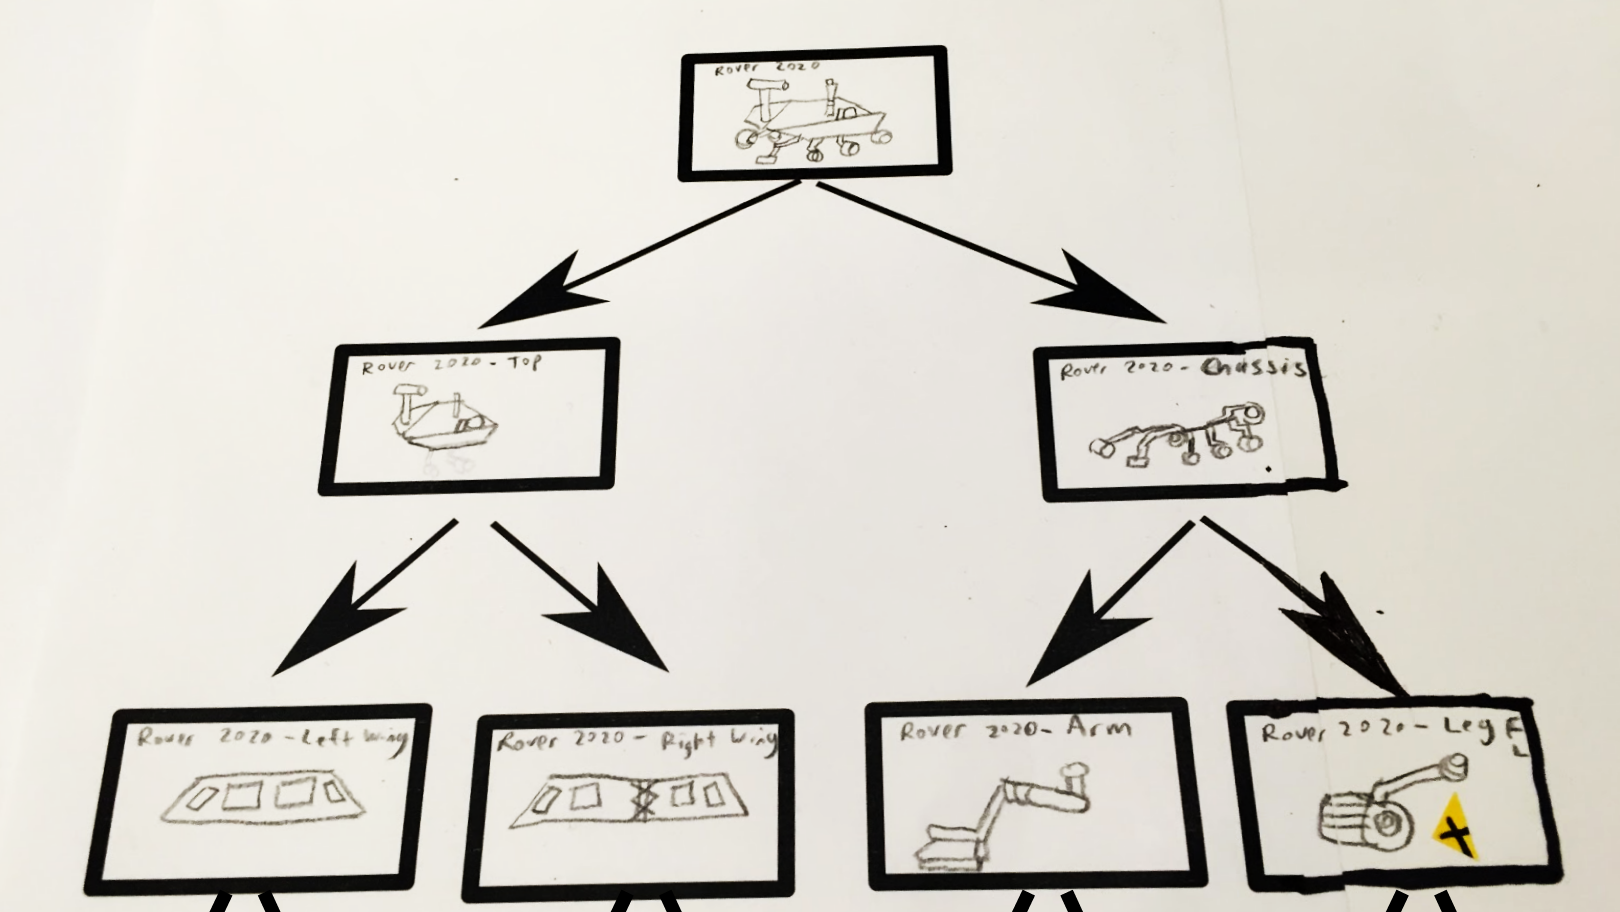
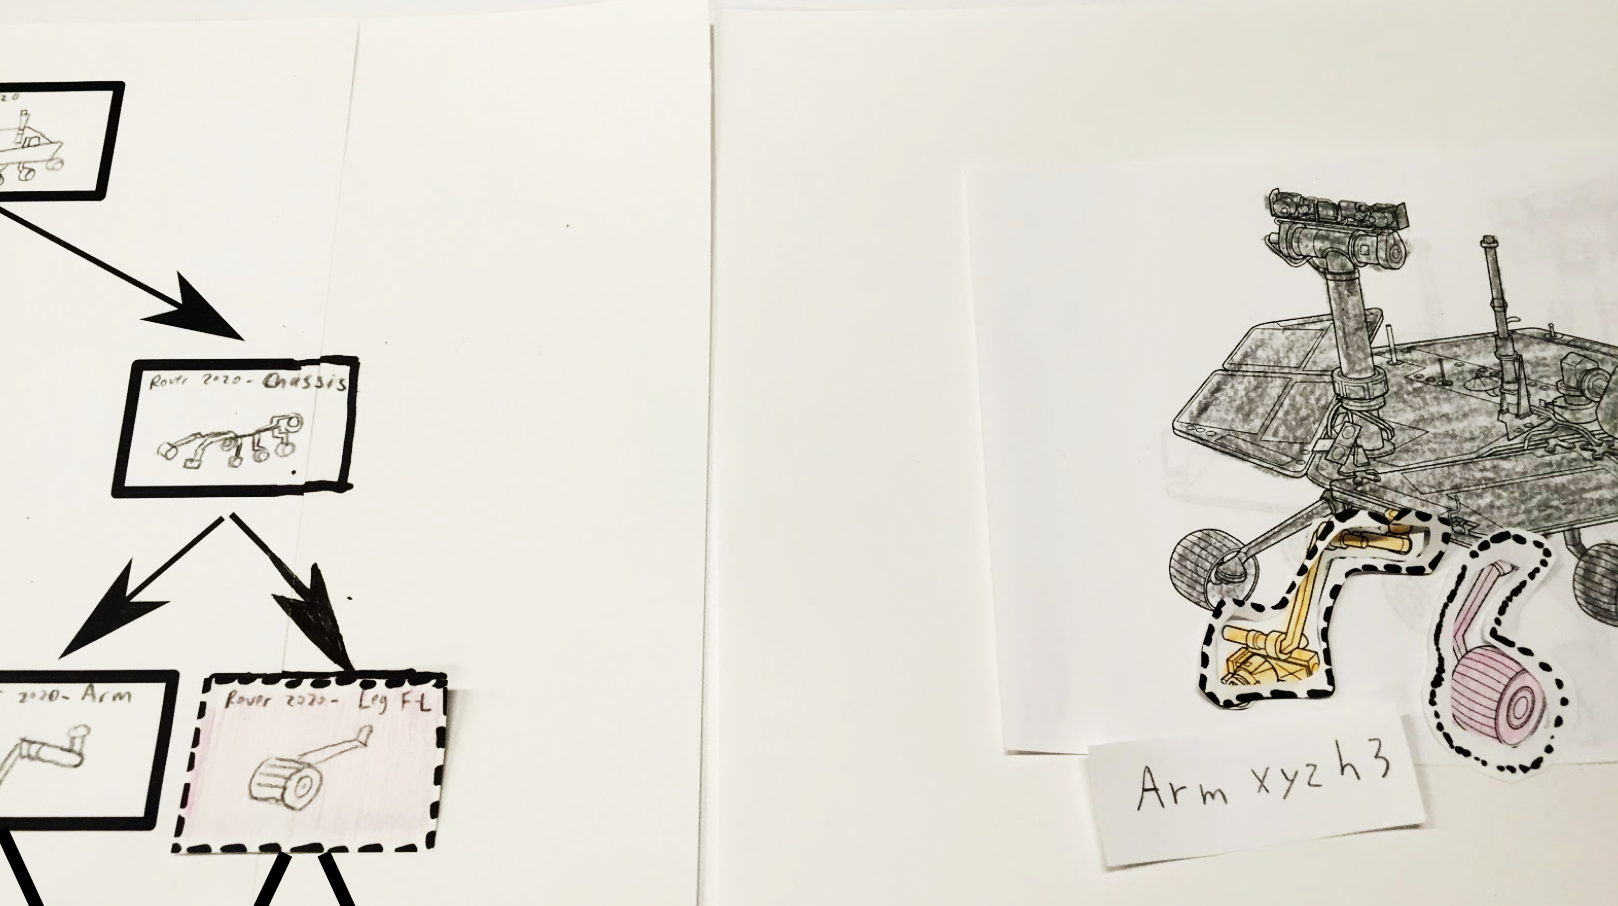
An example of a portion of what the names of the files in the CAD hierarchy look like

A sketch of a user using the HoloLens and the field of view
Picture Credit: Microsoft
The physical limitations of the FOV and available gestures of the HoloLens juxtaposed against the massive amount of information that the scientists have to navigate through create a necessity to save space. Through comparative analysis, persona development, physical and digital prototyping, user research, and feedback, we arrived at a design that combines a traditional map and slider with an augment that encourages exploration of the rover itself.
Time: 6 weeks
Team: On this design workshop, I worked with five other designers as part of Team Ada Lovelace. While all members had a role in the design process, my main role in this group revolved around fine-tuning the communication and content of our concepts and leading the physical prototyping.

Methods
User flows, research, comparative analysis, persona development, cardboard prototyping, play-dough prototyping, sketch prototyping, video prototyping, user research, and feedback.
Process
Discovery Process and Initial Research
To develop a better sense of the current state of navigating CAD models and augmented reality, we analyzed several programs that deal with complex models similar to what would be expected at the Ops Lab as well as other programs in augmented and virtual reality. Alongside these examples, we also looked into video games for interface and gestural inspiration.
Our initial brainstorm and research led us to begin our design process using a map and slider as they were elements found in most computer software dealing with complex hierarchies and used motions that could be easily translatable from a mouse into augmented reality.
After this, we began to physically prototype with playdough and go through a walkthrough of how the slider and map could work with each other.
Persona Development and User Flow
First draft of a user flow of an engineer using the slider hierarchy - Click on image to enlarge
We decided to focus our personas on engineers as they would be the primary user for our design. From there, we decided to take into account what types of engineers we would find in the OpsLab and the different ways that the user might understand or know the Mars Rover. For example, an engineer might be more familiar with the rover hierarchically and use a map of underlying systems of how the Rover operates while the other engineer might be more familiar with the Rover spatially and look at more diagrams of the Rover itself. These engineer's perception and understanding of the Rover would define the way they would prefer to navigate the virtual Rover. Upon this idea, our team decided to create another mode of navigation to accommodate engineer's who might be more familiar with the augment spatially.
This decision to consider the preference and way that an engineer might be familiar with the Mars Rover alongside our research of existing ways to navigate complex hierarchies and the interfaces in augmented and virtual reality lead us to begin prototyping three main augments for our solutions: the NavTree, a Hierarchy Slider, and a miniature Mars Rover that would eventually be part of an augment called the Explosphere.

Explosphere
NavTree

Hierarchy Slider
A brief introduction to using the HoloLens
Gestures/Physicality
The HoloLens recognizes the following gestures in Protospace: single-tap, double-tap, and tap and drag. To point at an object, the user is required to gaze at the object with their head and move a small yellow dot to the object that they would like to focus on. For example, if the user wanted to select the wheel of the Mars Rover, they would guide their gaze to the wheel, make sure the yellow dot was on the wheel, outreach their arm, and tap into space.

The Microsoft HoloLens
Picture Credit: Microsoft
Protospace UI
The current UI by Protospace is a blue navigation bar that allows several different modes. The toolbar acts like an assistant that follows you around as you interact with the model. It appears and hides when you double-tap outside of the model. What’s important to know is that there are minimal options for the user to interact with the Rover and that it does not provide an easy way to manage the complexity the Rover itself.
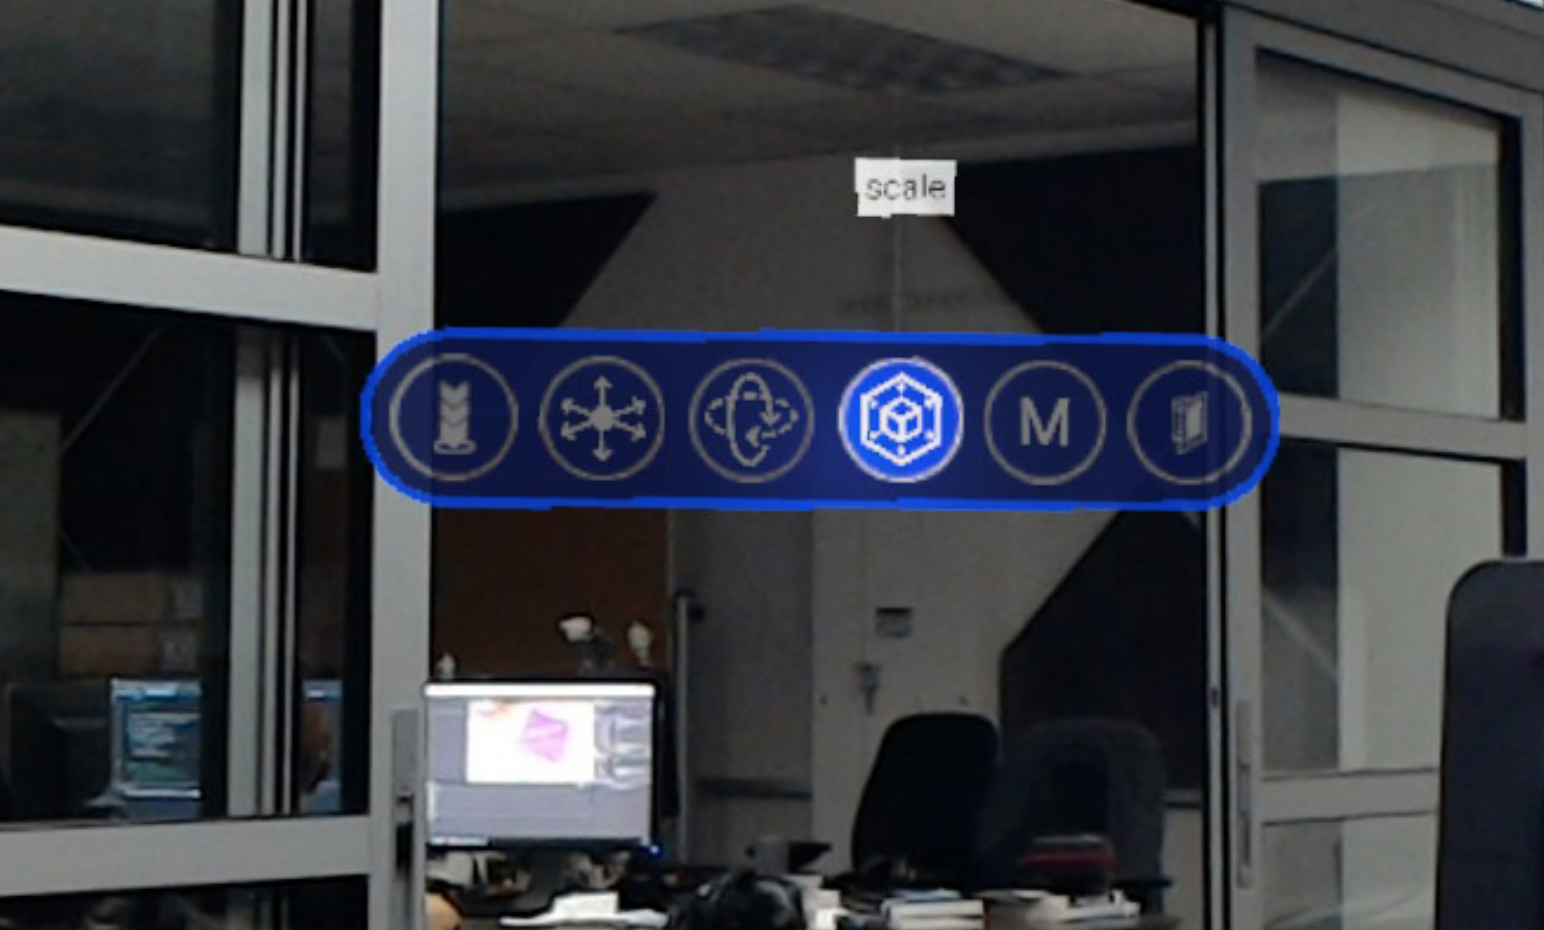
The current UI by Protospace
Picture Credit: NASA
Aside from giving the user more independence the in program, another goal was to give the user more options of selecting, navigating the complexity of the CAD models, and being able to make more decisions between these different levels.
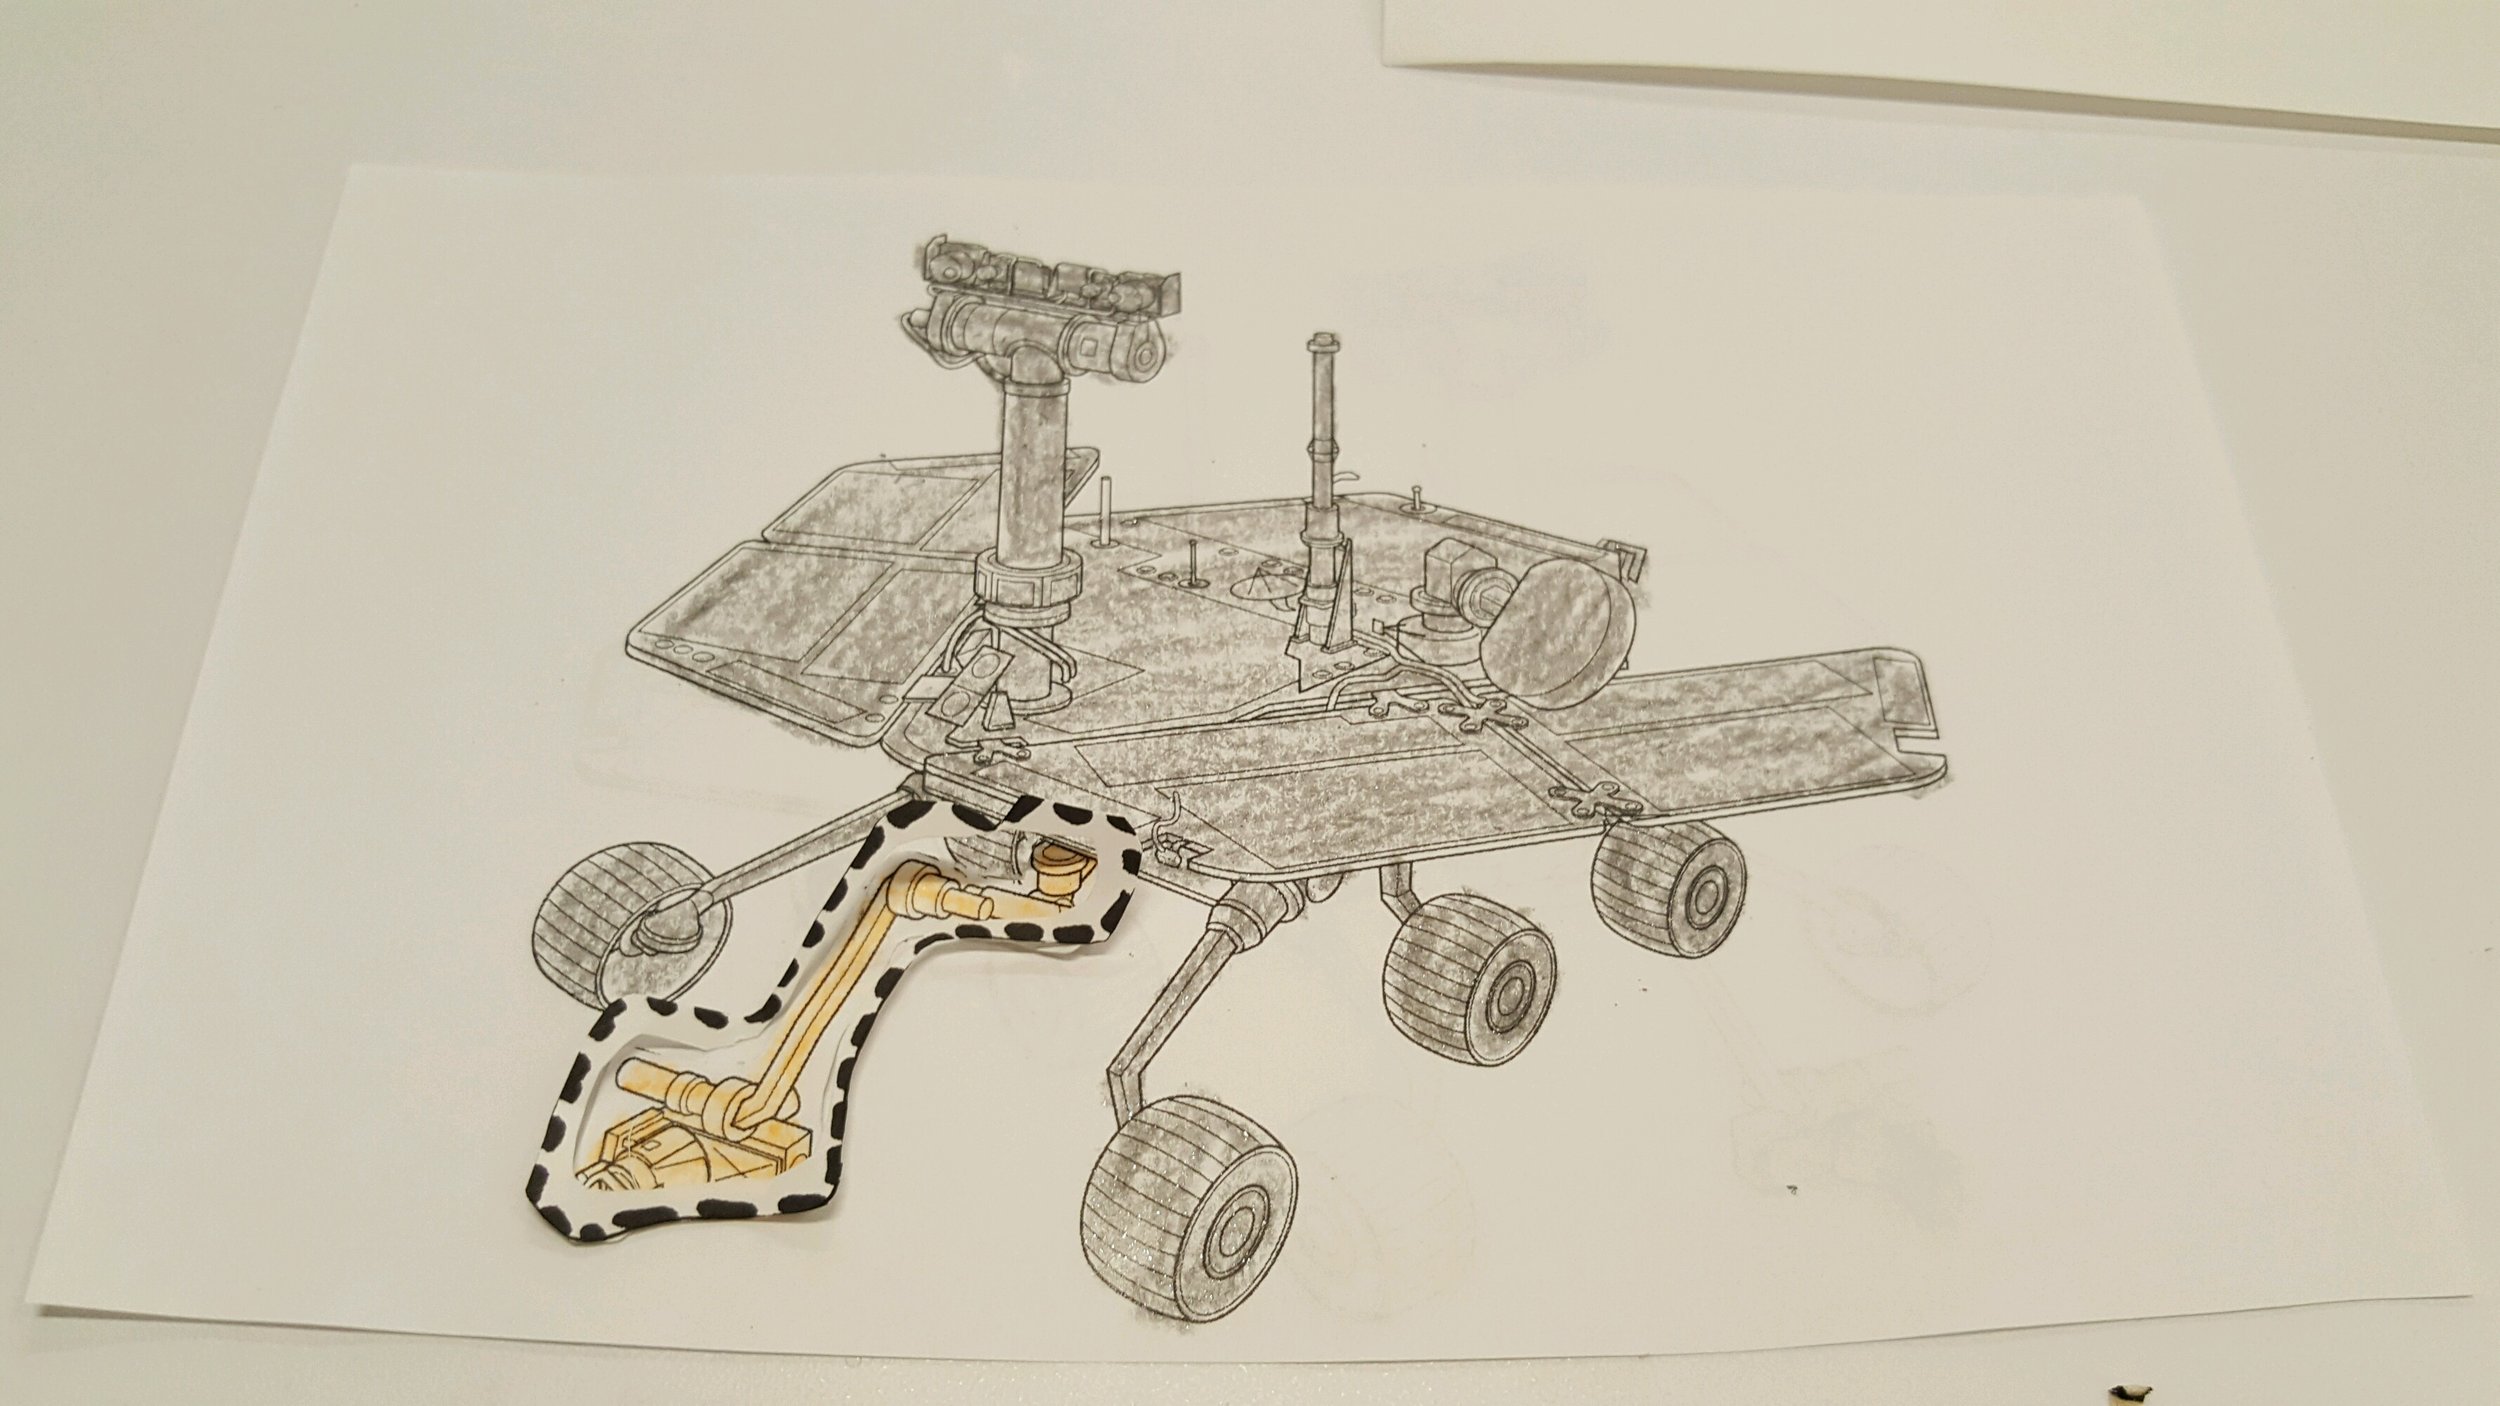
Currently, if a user wanted to select the entire arm of the Mars Rover it would be impossible to do so without assistance from a computer program. This is because the default level of the selection process is to select an object from the lowest level of the hierarchy. For example, if the user wanted were to try to select the arm of the Mars Rover without help or going to the computer first, they might only select a screw or panel on the arm of the Rover instead. For them to select the entire arm, they would need to adjust a setting on a computer by themselves or with a partner. This interaction highlights the necessity to develop a way for the user to be able to have more control of what they were selecting.
We were interested in developing ways to translate the methods of selecting found on computers to the HoloLens. For example, to select multiple objects in a computer program, a user typically holds down shift while clicking. In the HoloLens, it is only possible to do one gesture at a time, meaning if a single tap translates to clicking, then it is impossible to “hold shift” simultaneously.
Prototypes
Prototype #1: Hierarchy Map and Slider
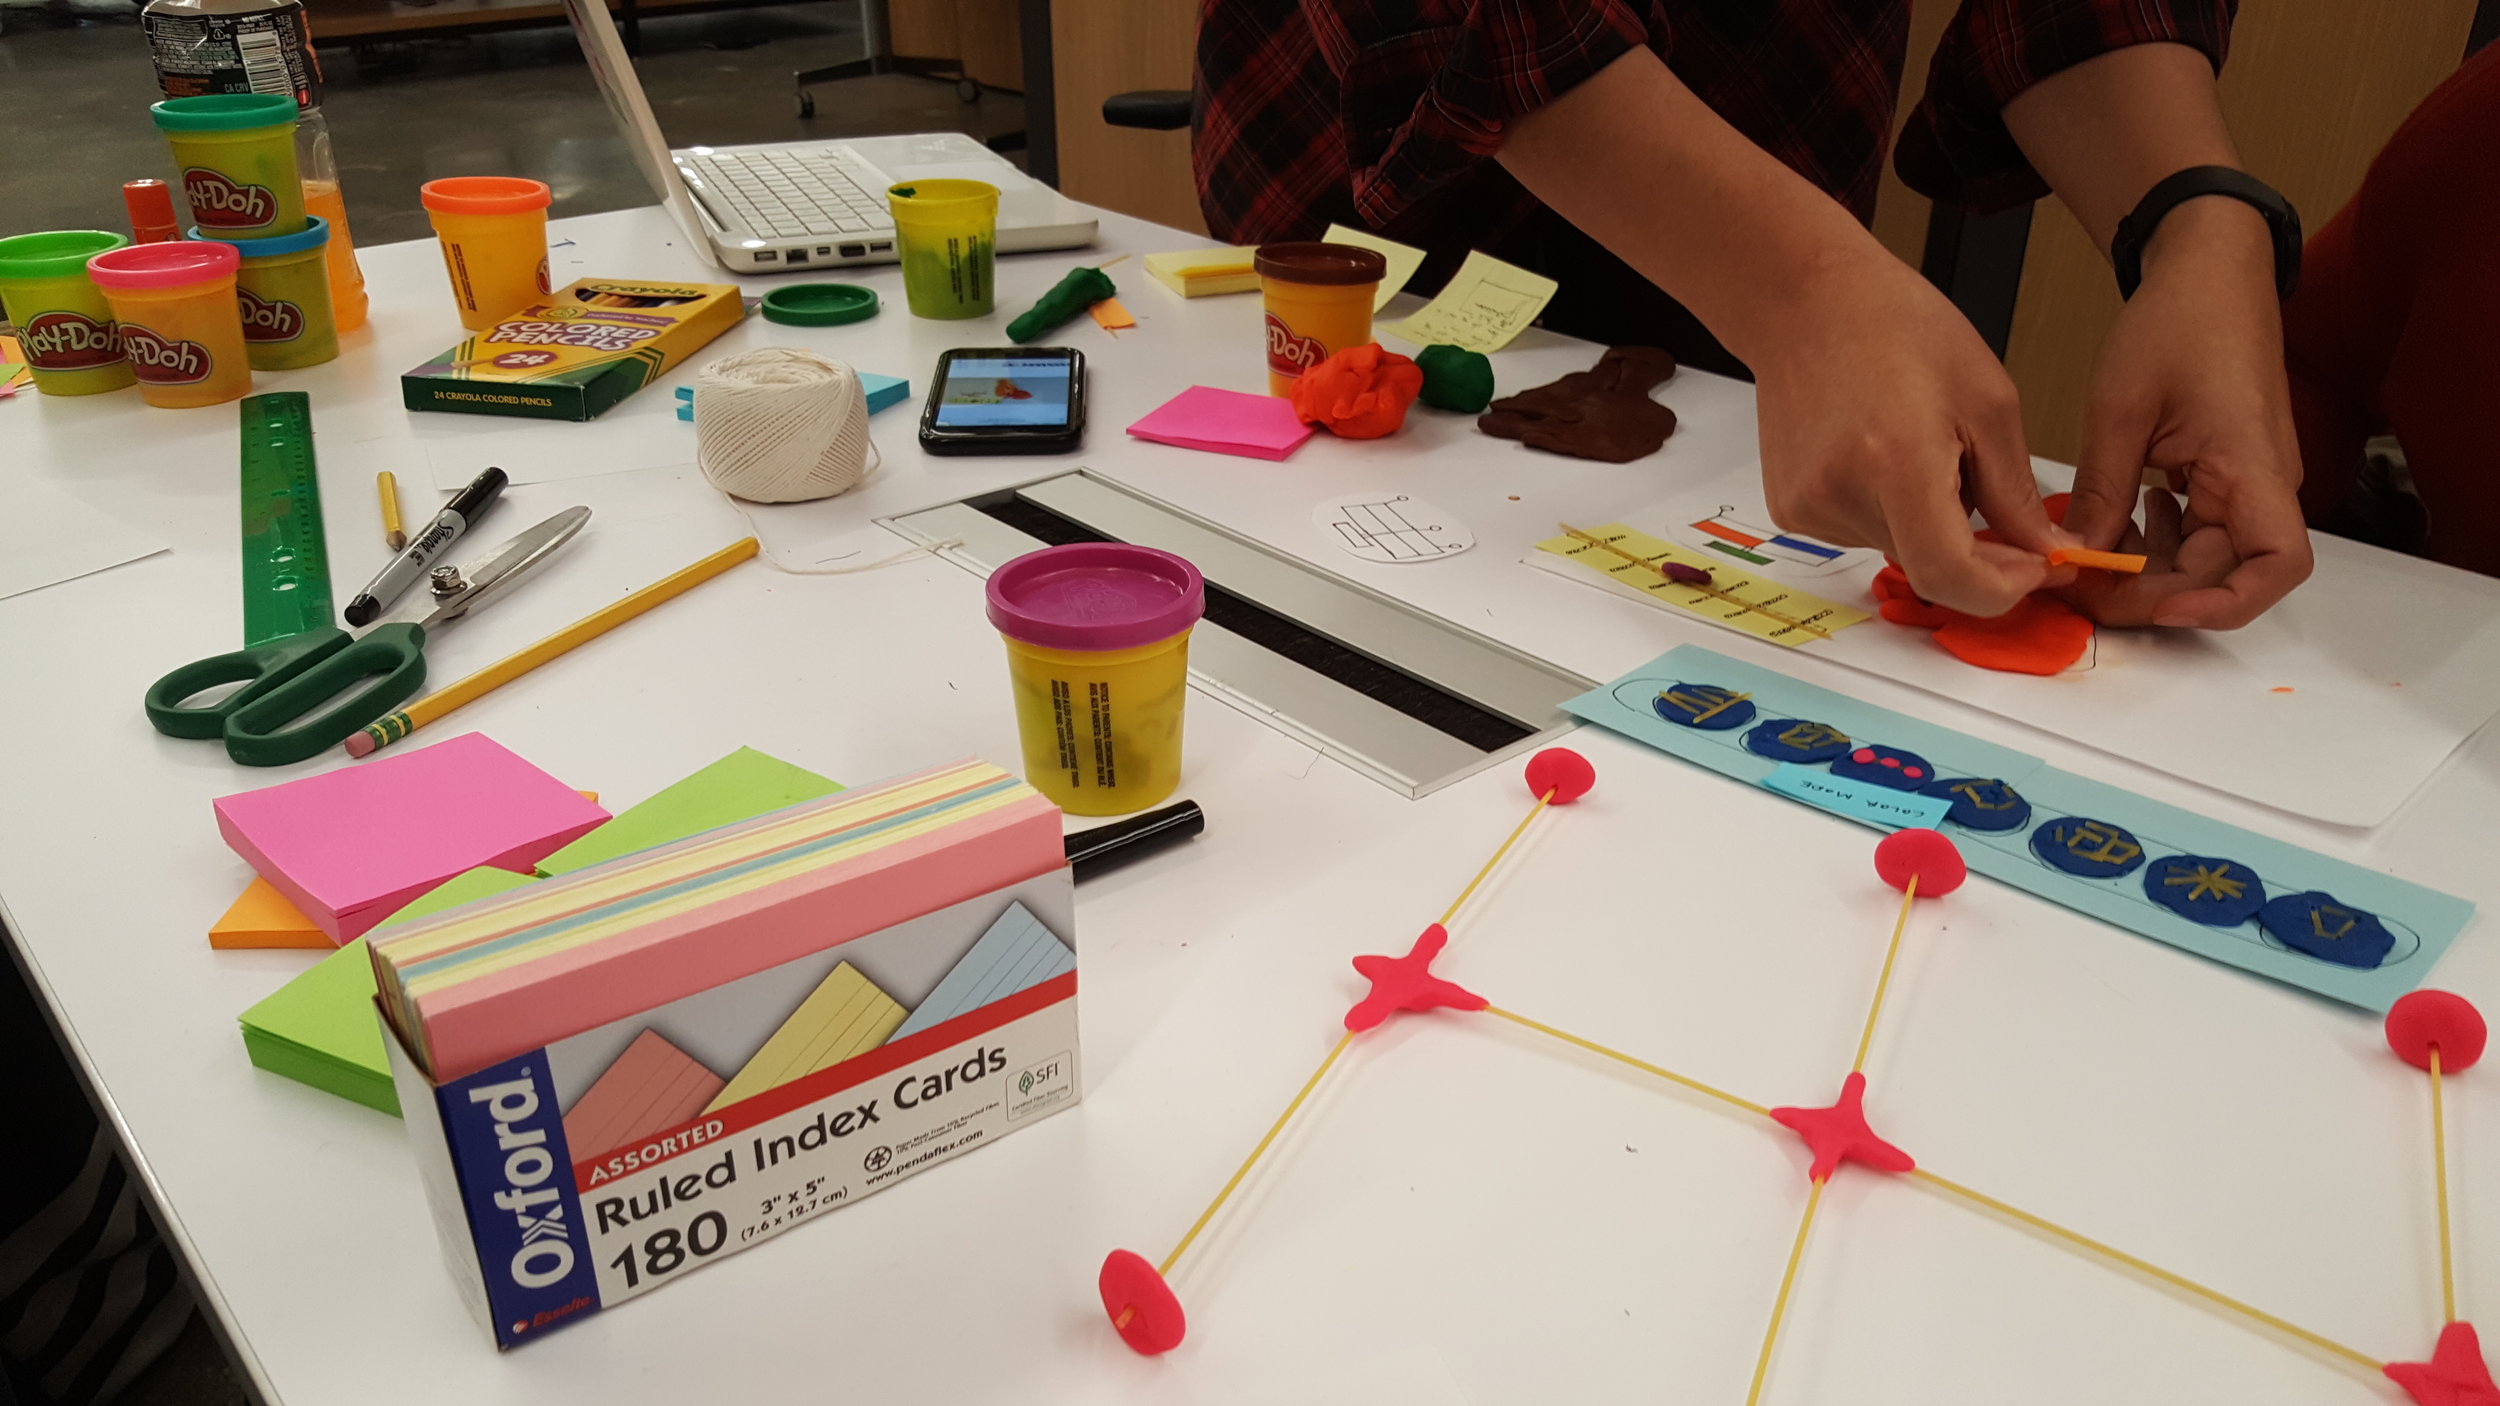
Materials: Playdough, Spaghetti, Paper
Main Role: Creating playdough rover arm and gifs

Creating the playdough prototype for the gifs
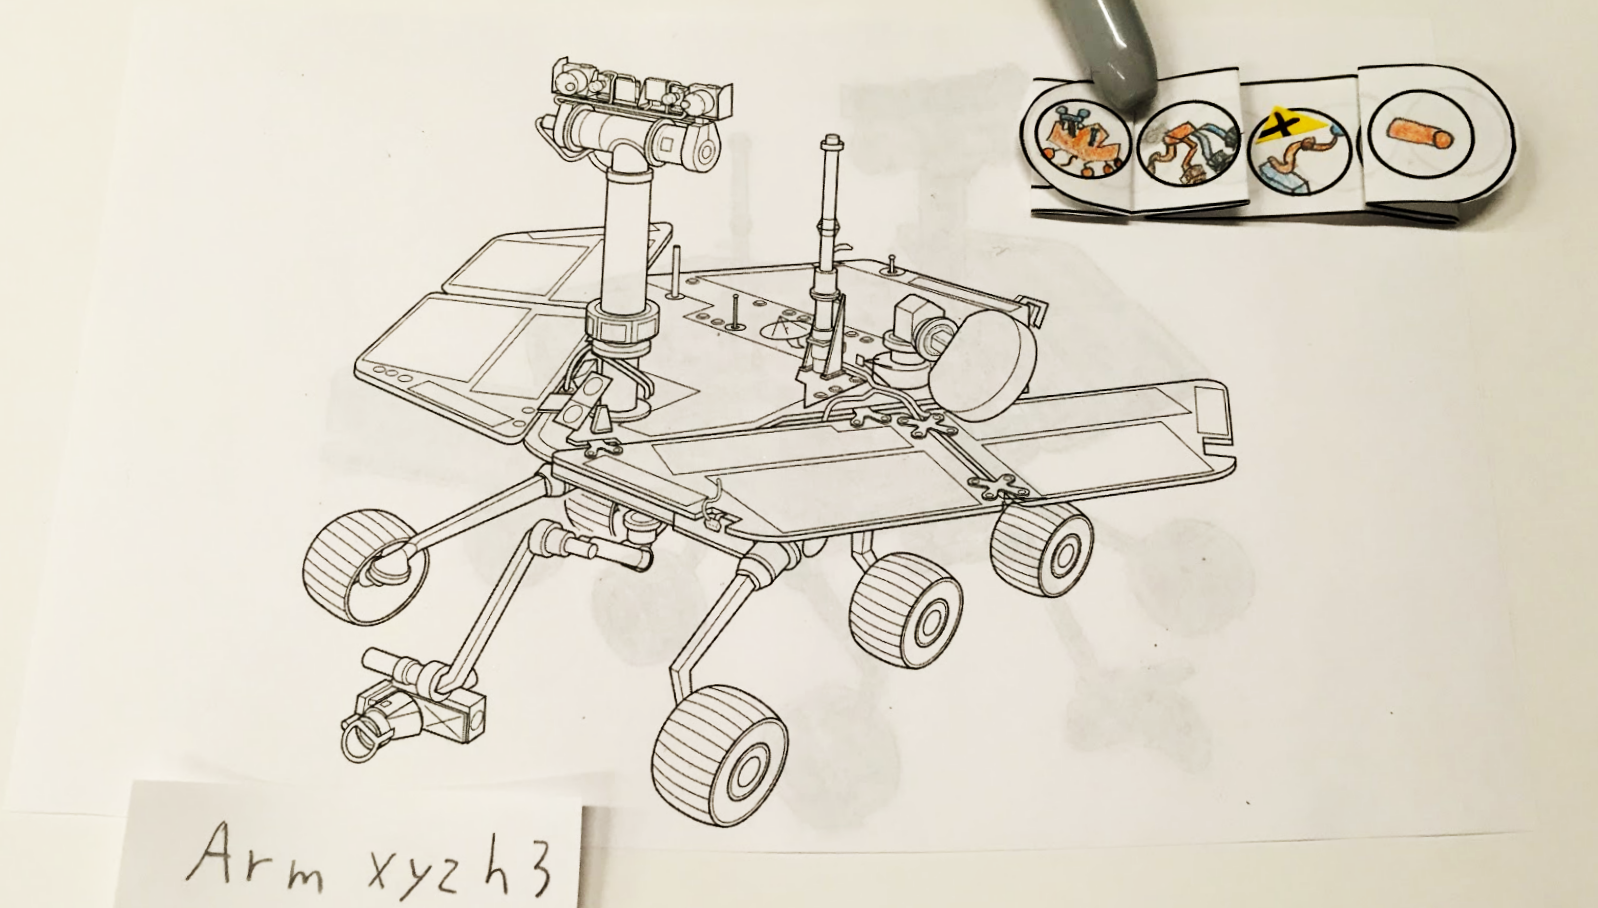
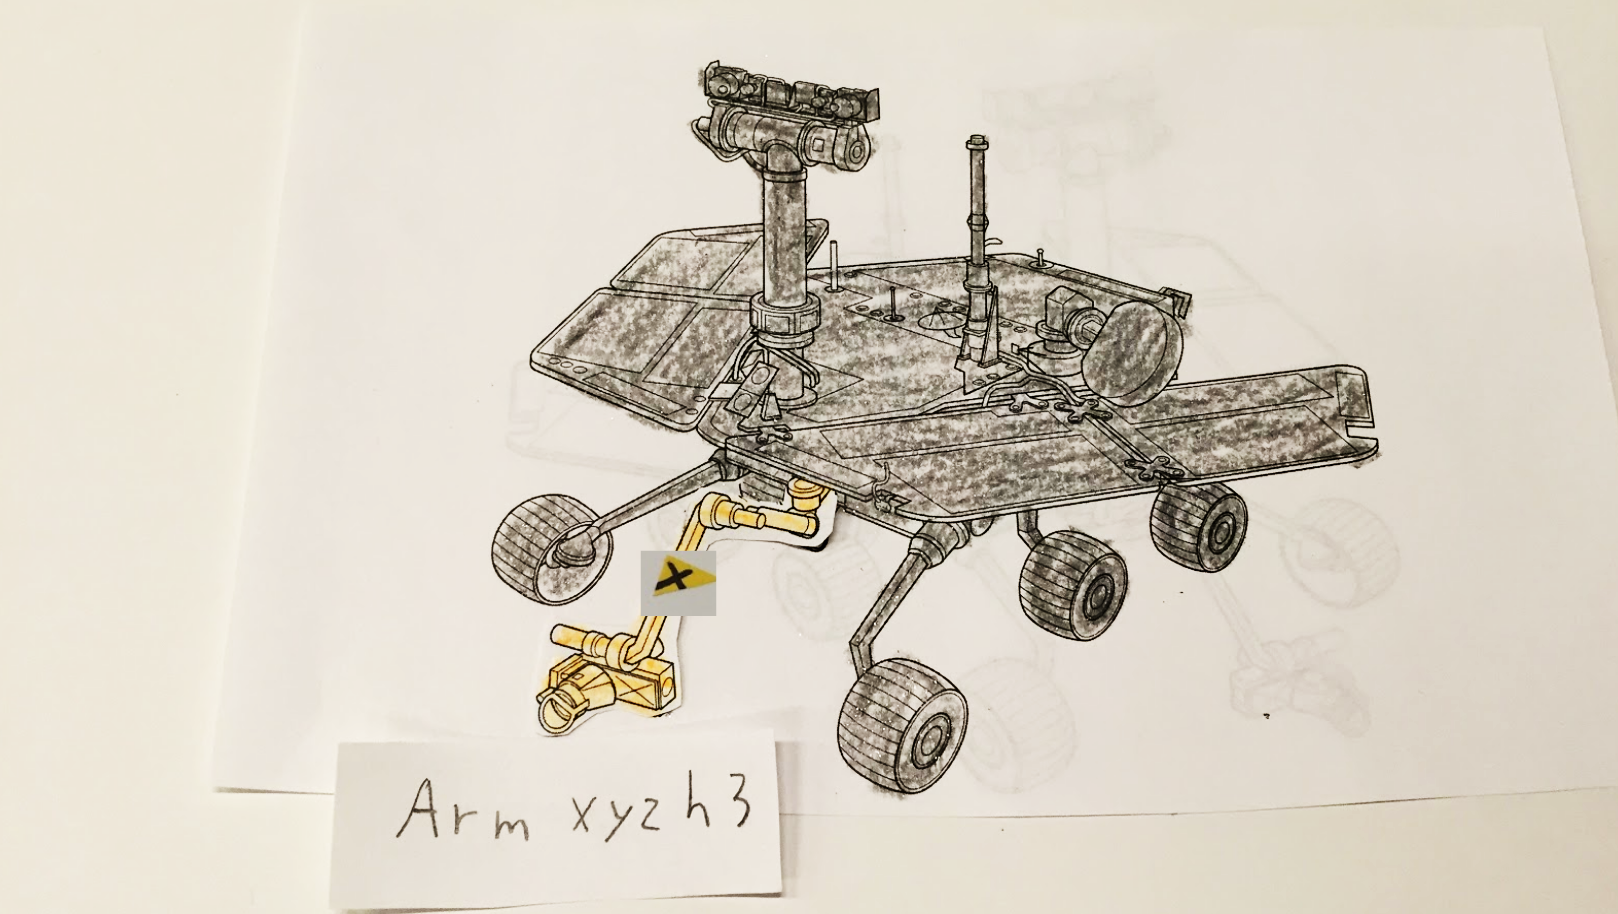
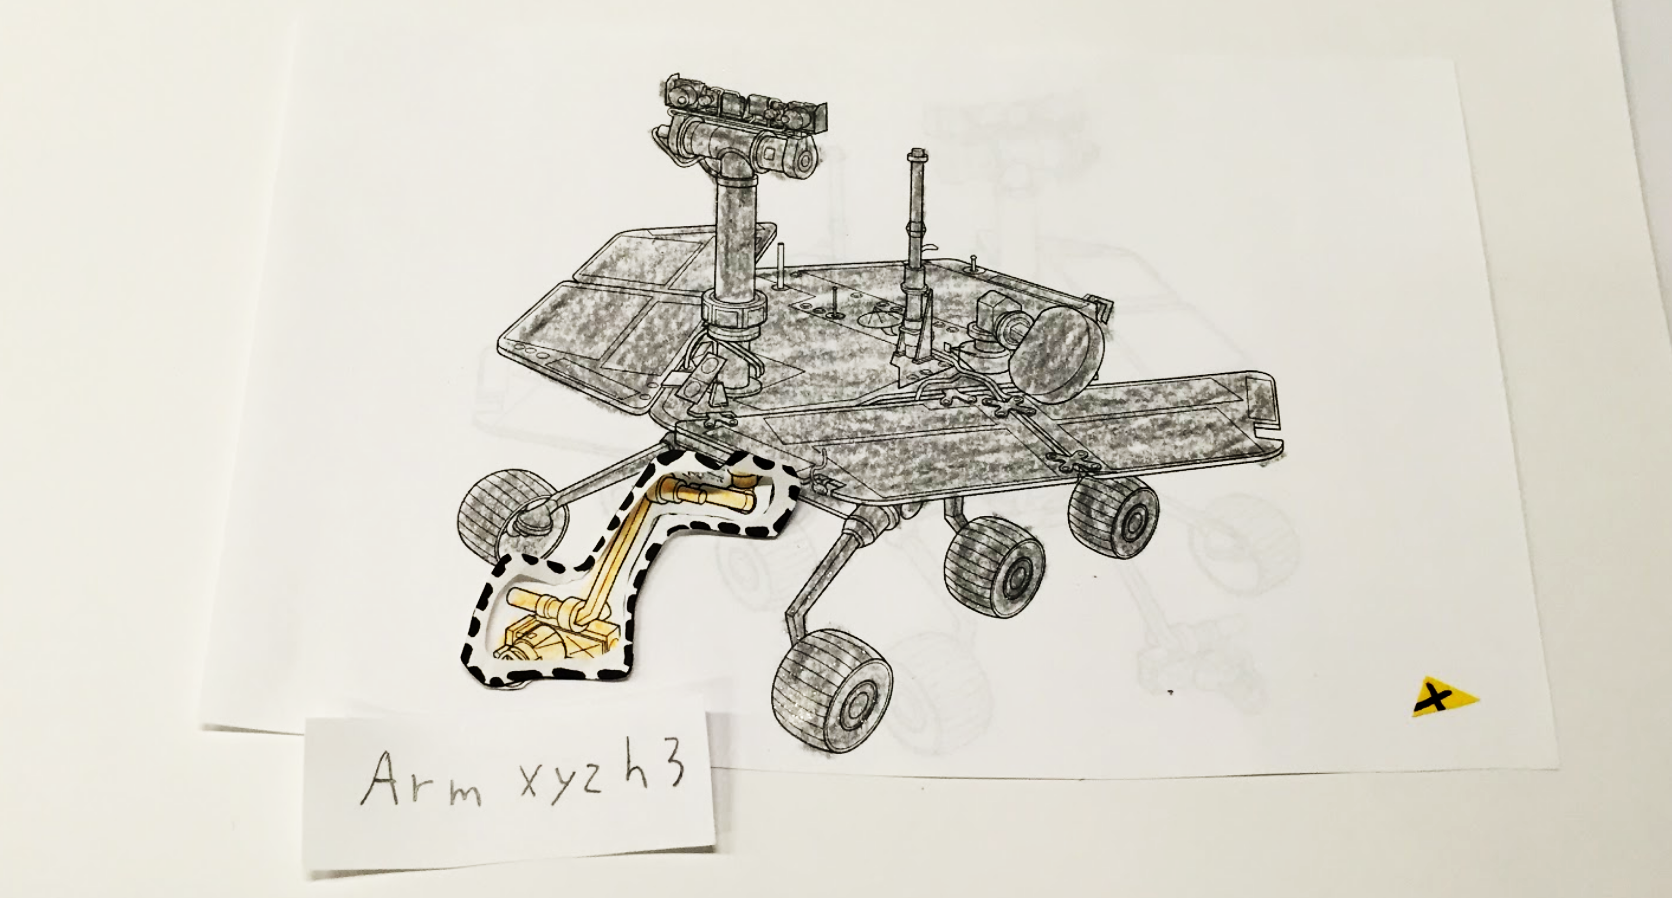
In this prototype, we included our own augments to the existing HoloLens interface and selection process. We decided to focus on fine tuning the interactions of selecting a part on the Mars Rover and finding a more elegant way to allow the user to jump between hierarchies.
Our group’s goals was to find the best place to incorporate our ideas into the this process, to mentally and physically ingrain and break down the process of using the HoloLens.
Results: We were happy with how the Slider works and decided to further develop the Hierarchy Map to more accurately represent the complexity of the CAD files.

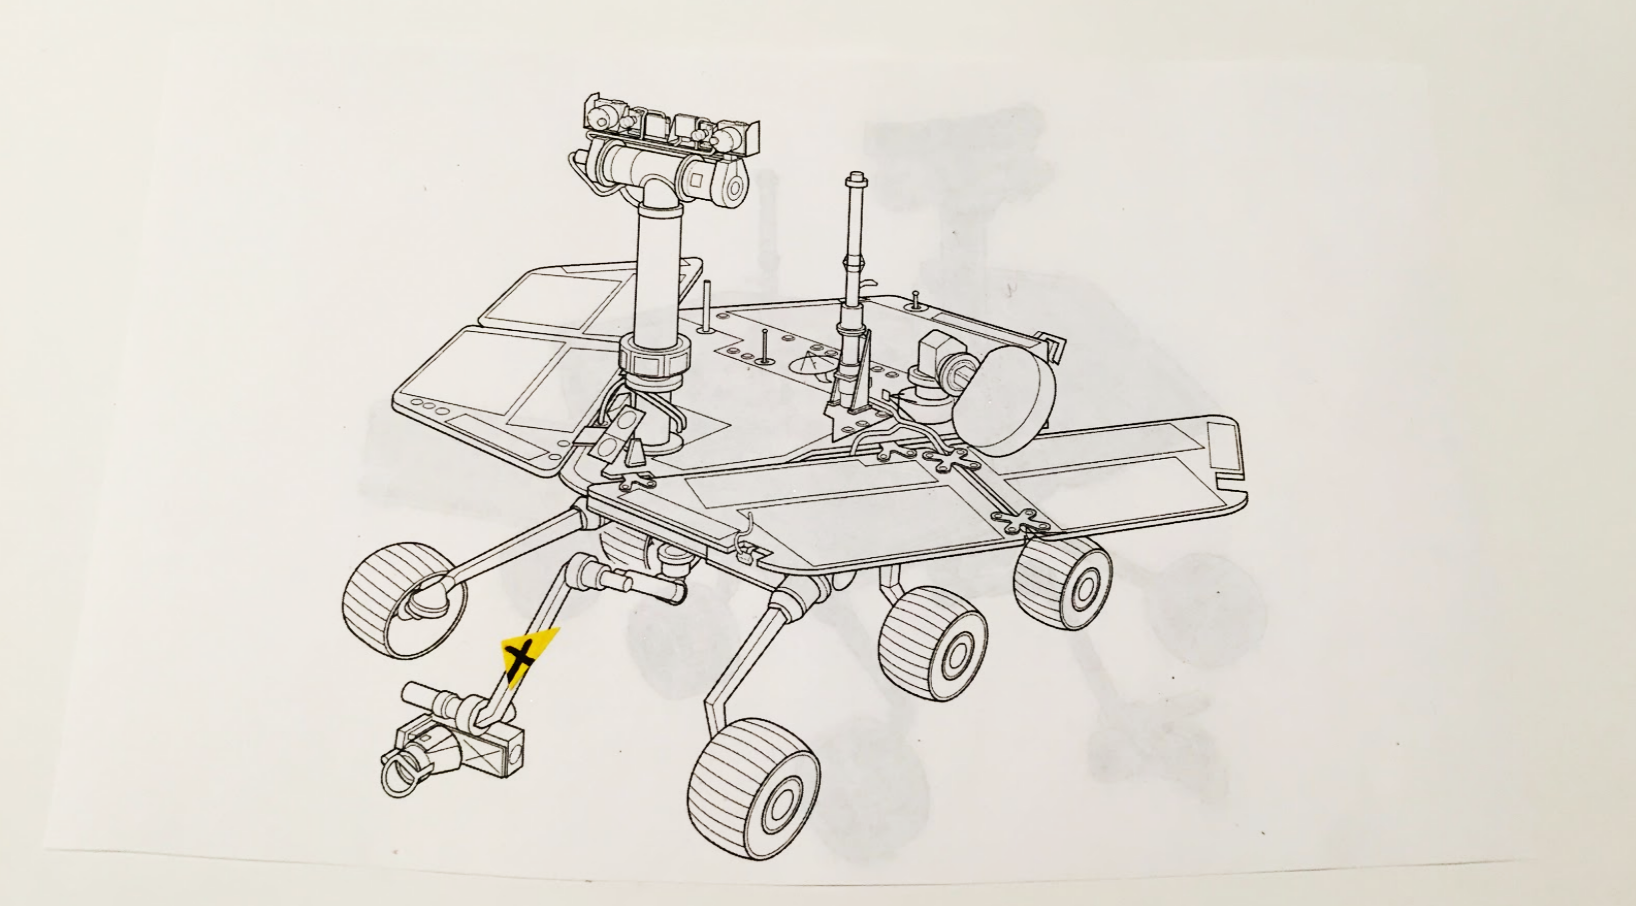
Simulation of user selecting the Mars Rover arm using the Slider. This version of the hierarchy map (on the right) shows the relationship between the selected arm and its position on the Rover.
Prototype #2: Hierarchy Map and Slider
Materials: Paper
Main Role: Fine tuning how to communicate how to use the Hierarchy Map
The focus of this paper prototype was to use a more developed version of the Hierarchy Map and to try to incorporate a way to select more than one object at a time. By this prototype, we decided to experiment with the idea of “pinning” objects as a way to give an options of selecting (or pinning) more than one object at a time. The user would also have the option of pinning through the Slider and Hierarchy Map. We also replaced the Slider with a pop up that mimics the UI of Protospace, a design choice that was only used in this version of the prototype.

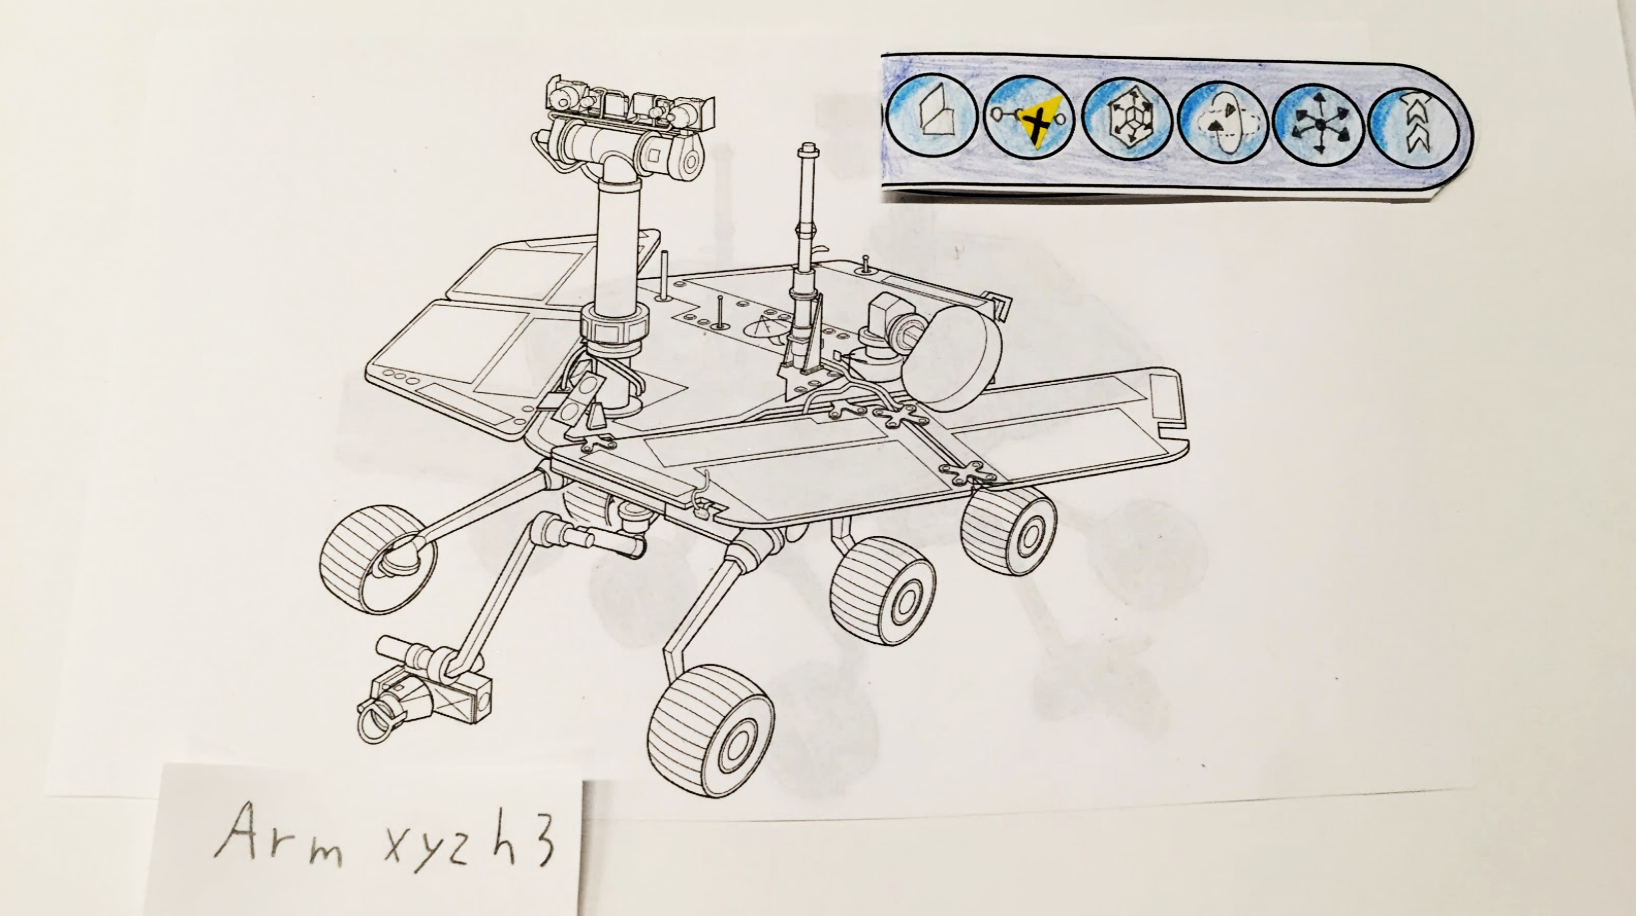
Results: Through testing, we realized that it was a better for our Slider to remain a slider rather than mimic the UI of Protospace with “buttons” to further separate the gestures via function. For example, the gesture to pin and select was the same as the one to switch between levels. After this, we decided to go back to the Slider. While the Hierarchy Map gave a new feature which allows the user to see the relationship between the part they had selected to the rest of the Rover, we also wanted to fine tuning the interaction between it and the Slider. The example we used did not require the user to switch between hierarchies while using the Hierarchy Map and we wanted to make sure that the system would work in process that would require more steps.
After presenting the ideas to others for feedback, we wanted to make sure our designs would work in the HoloLens’ small FOV and to get a better sense of the physicality of the experience of our prototype. Moving forward, we decided to develop a method to add more physical constraints to the user to more accurately test our designs.
Prototype #3: Mini-Rover, Hierarchy Map, and Slider

Alexa (left) and me (right) working on the cardboard Rovers
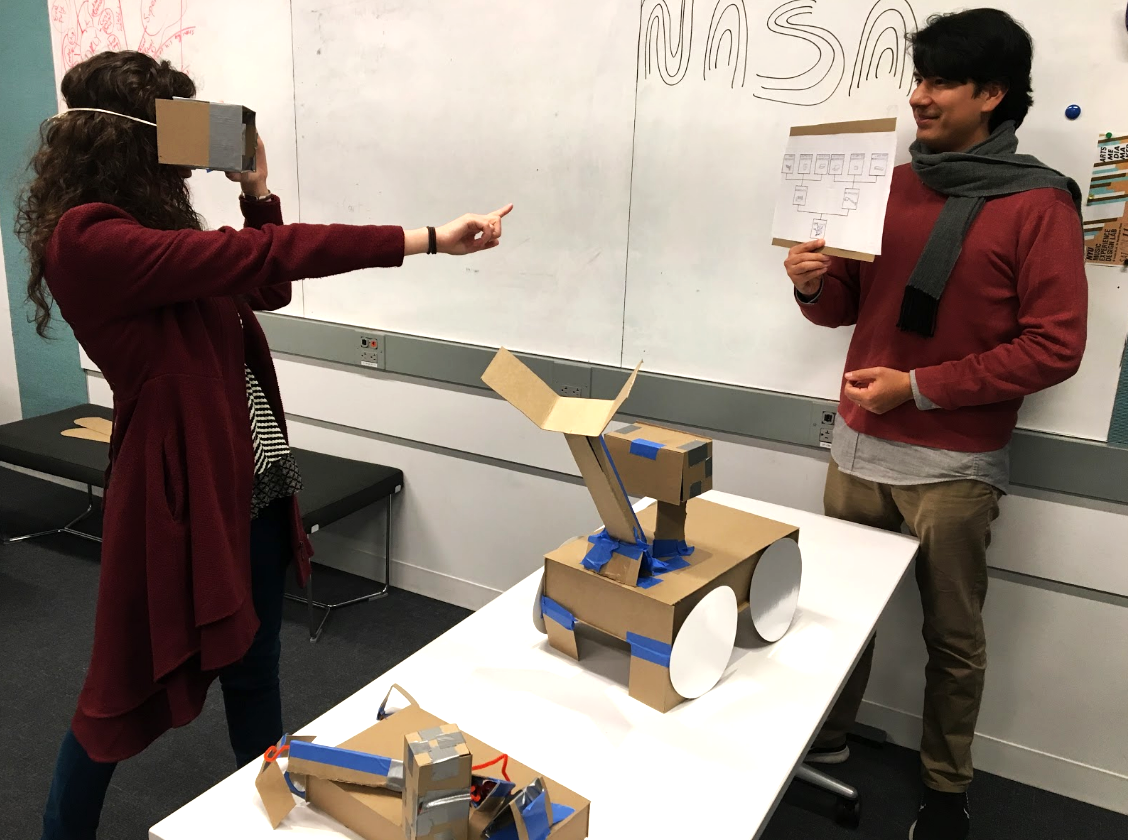
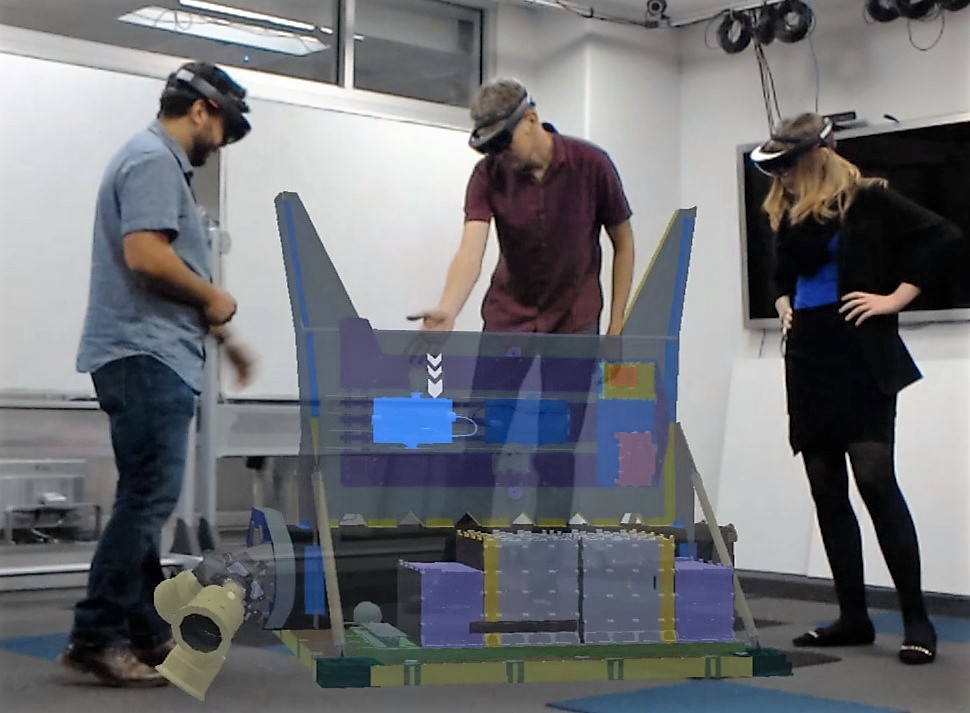
Tatiana (left) and Albert (right) testing out our cardboard HoloLens and Hierarchy Map
Materials: Cardboard, string, take-out containers, tape, transparencies, paper
Main Role: Leading cardboard prototype
For this iteration, our focus was to work on simulating the physical experience of using the HoloLens without actually using the HoloLens. This meant simulating the small FOV of the HoloLens and how the UI activates depending on gestures. We also wanted to see if a user could figure out how to switch between levels in the hierarchy of the models using the map and which mode of navigation that they preferred.

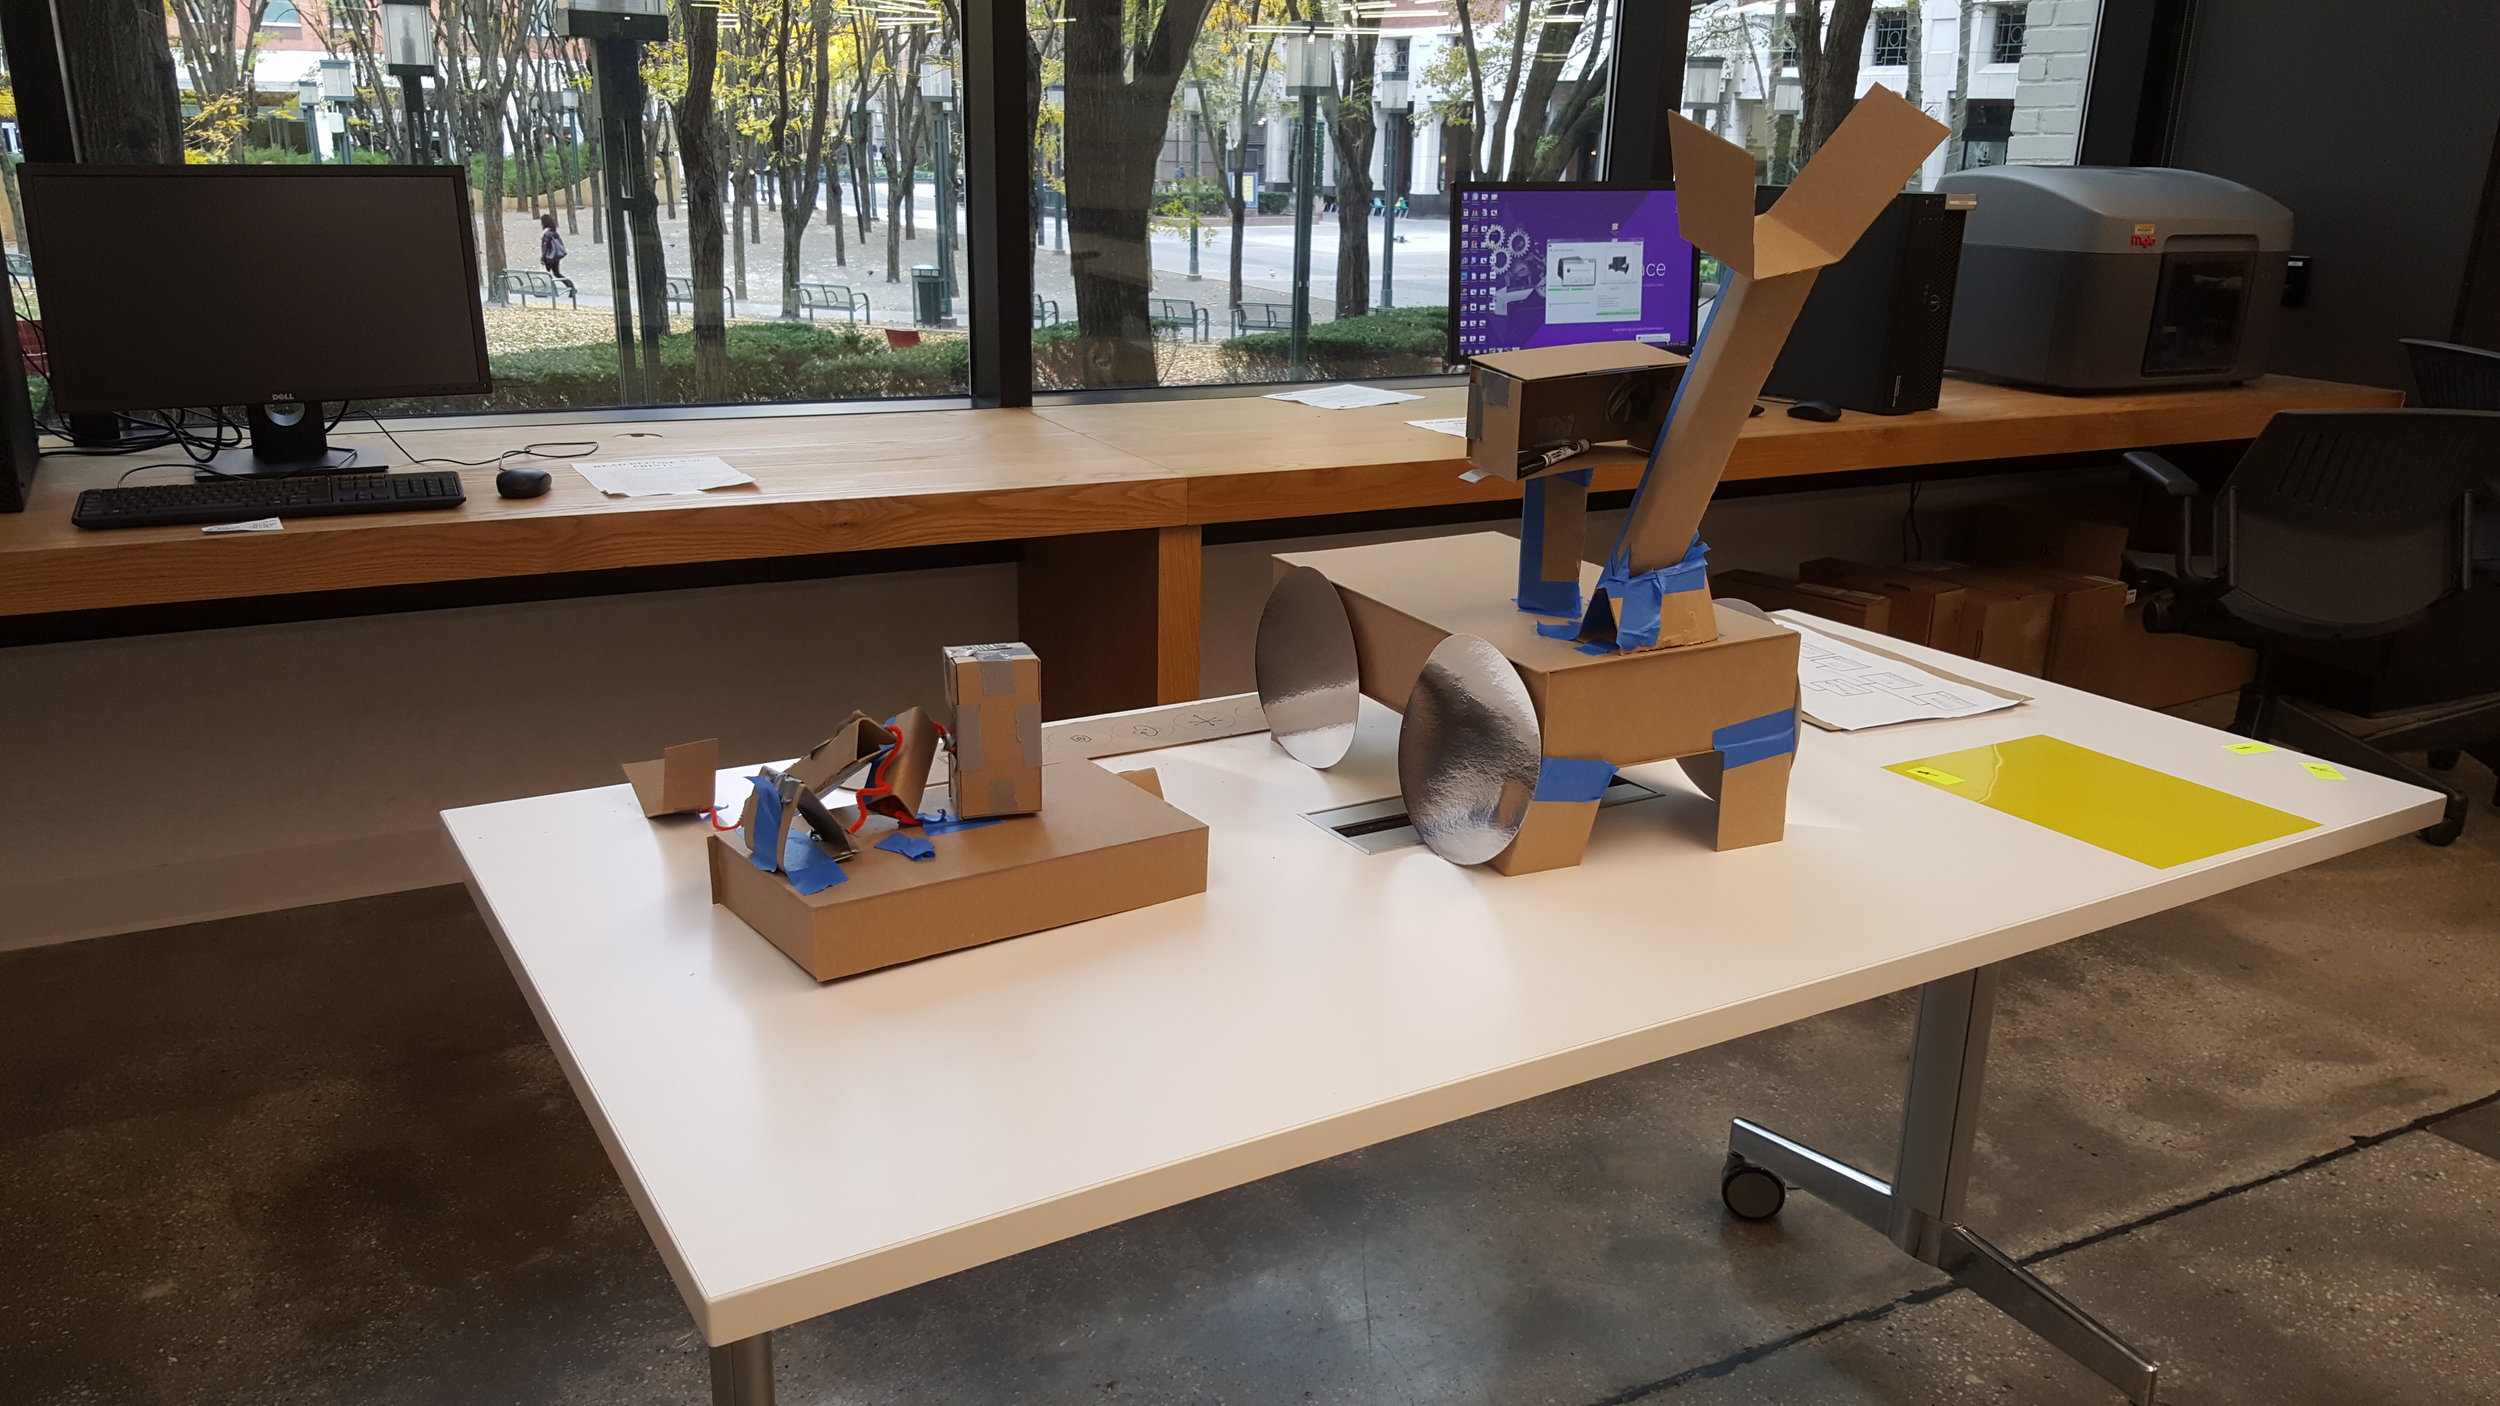
An exploded mini-Rover (left) next to a larger Mars Rover (right)
It was at this stage that we decided to experiment and include a miniature Mars Rover (mini-Rover) as part of our design. This mini-Rover would act as another mode of navigating the large Mars Rover. Its main purpose was to provide an exploded view of a user-selected object and would explode one hierarchy level down. This option was to be available for users who might prefer to sort through the physical parts without searching through the large augment while also trying to push the design of our interface to utilize more of the 3D space.

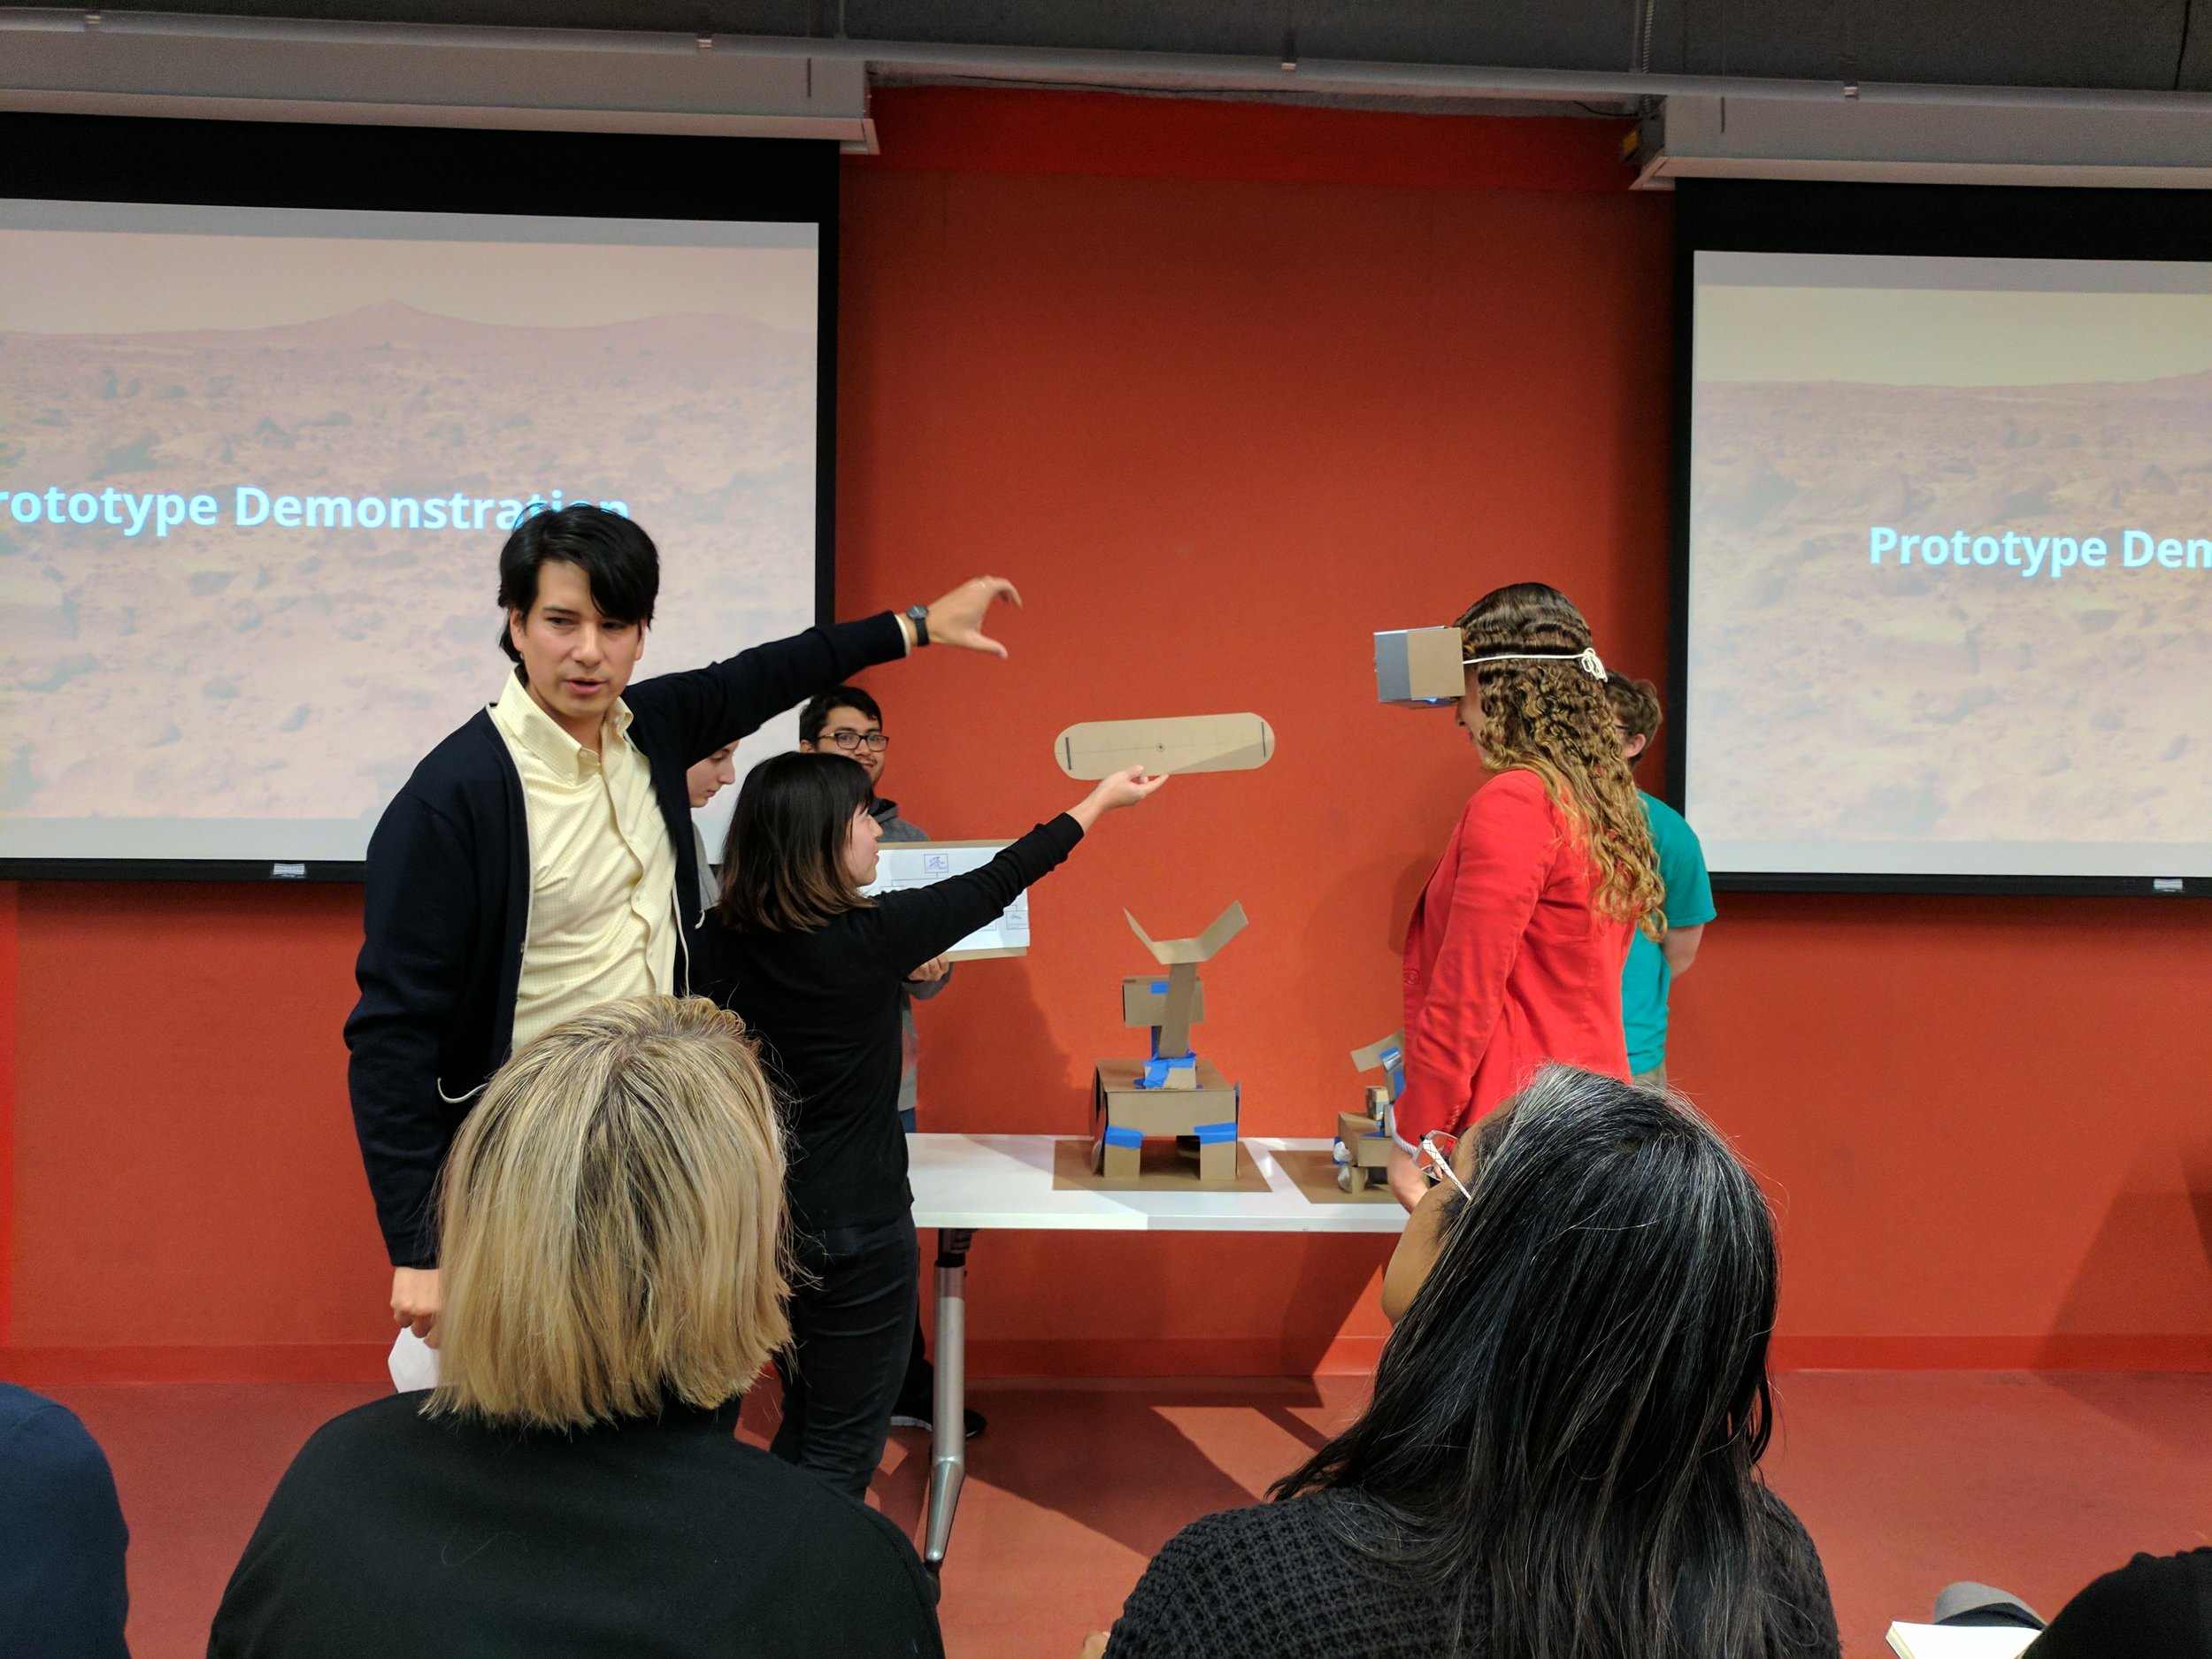
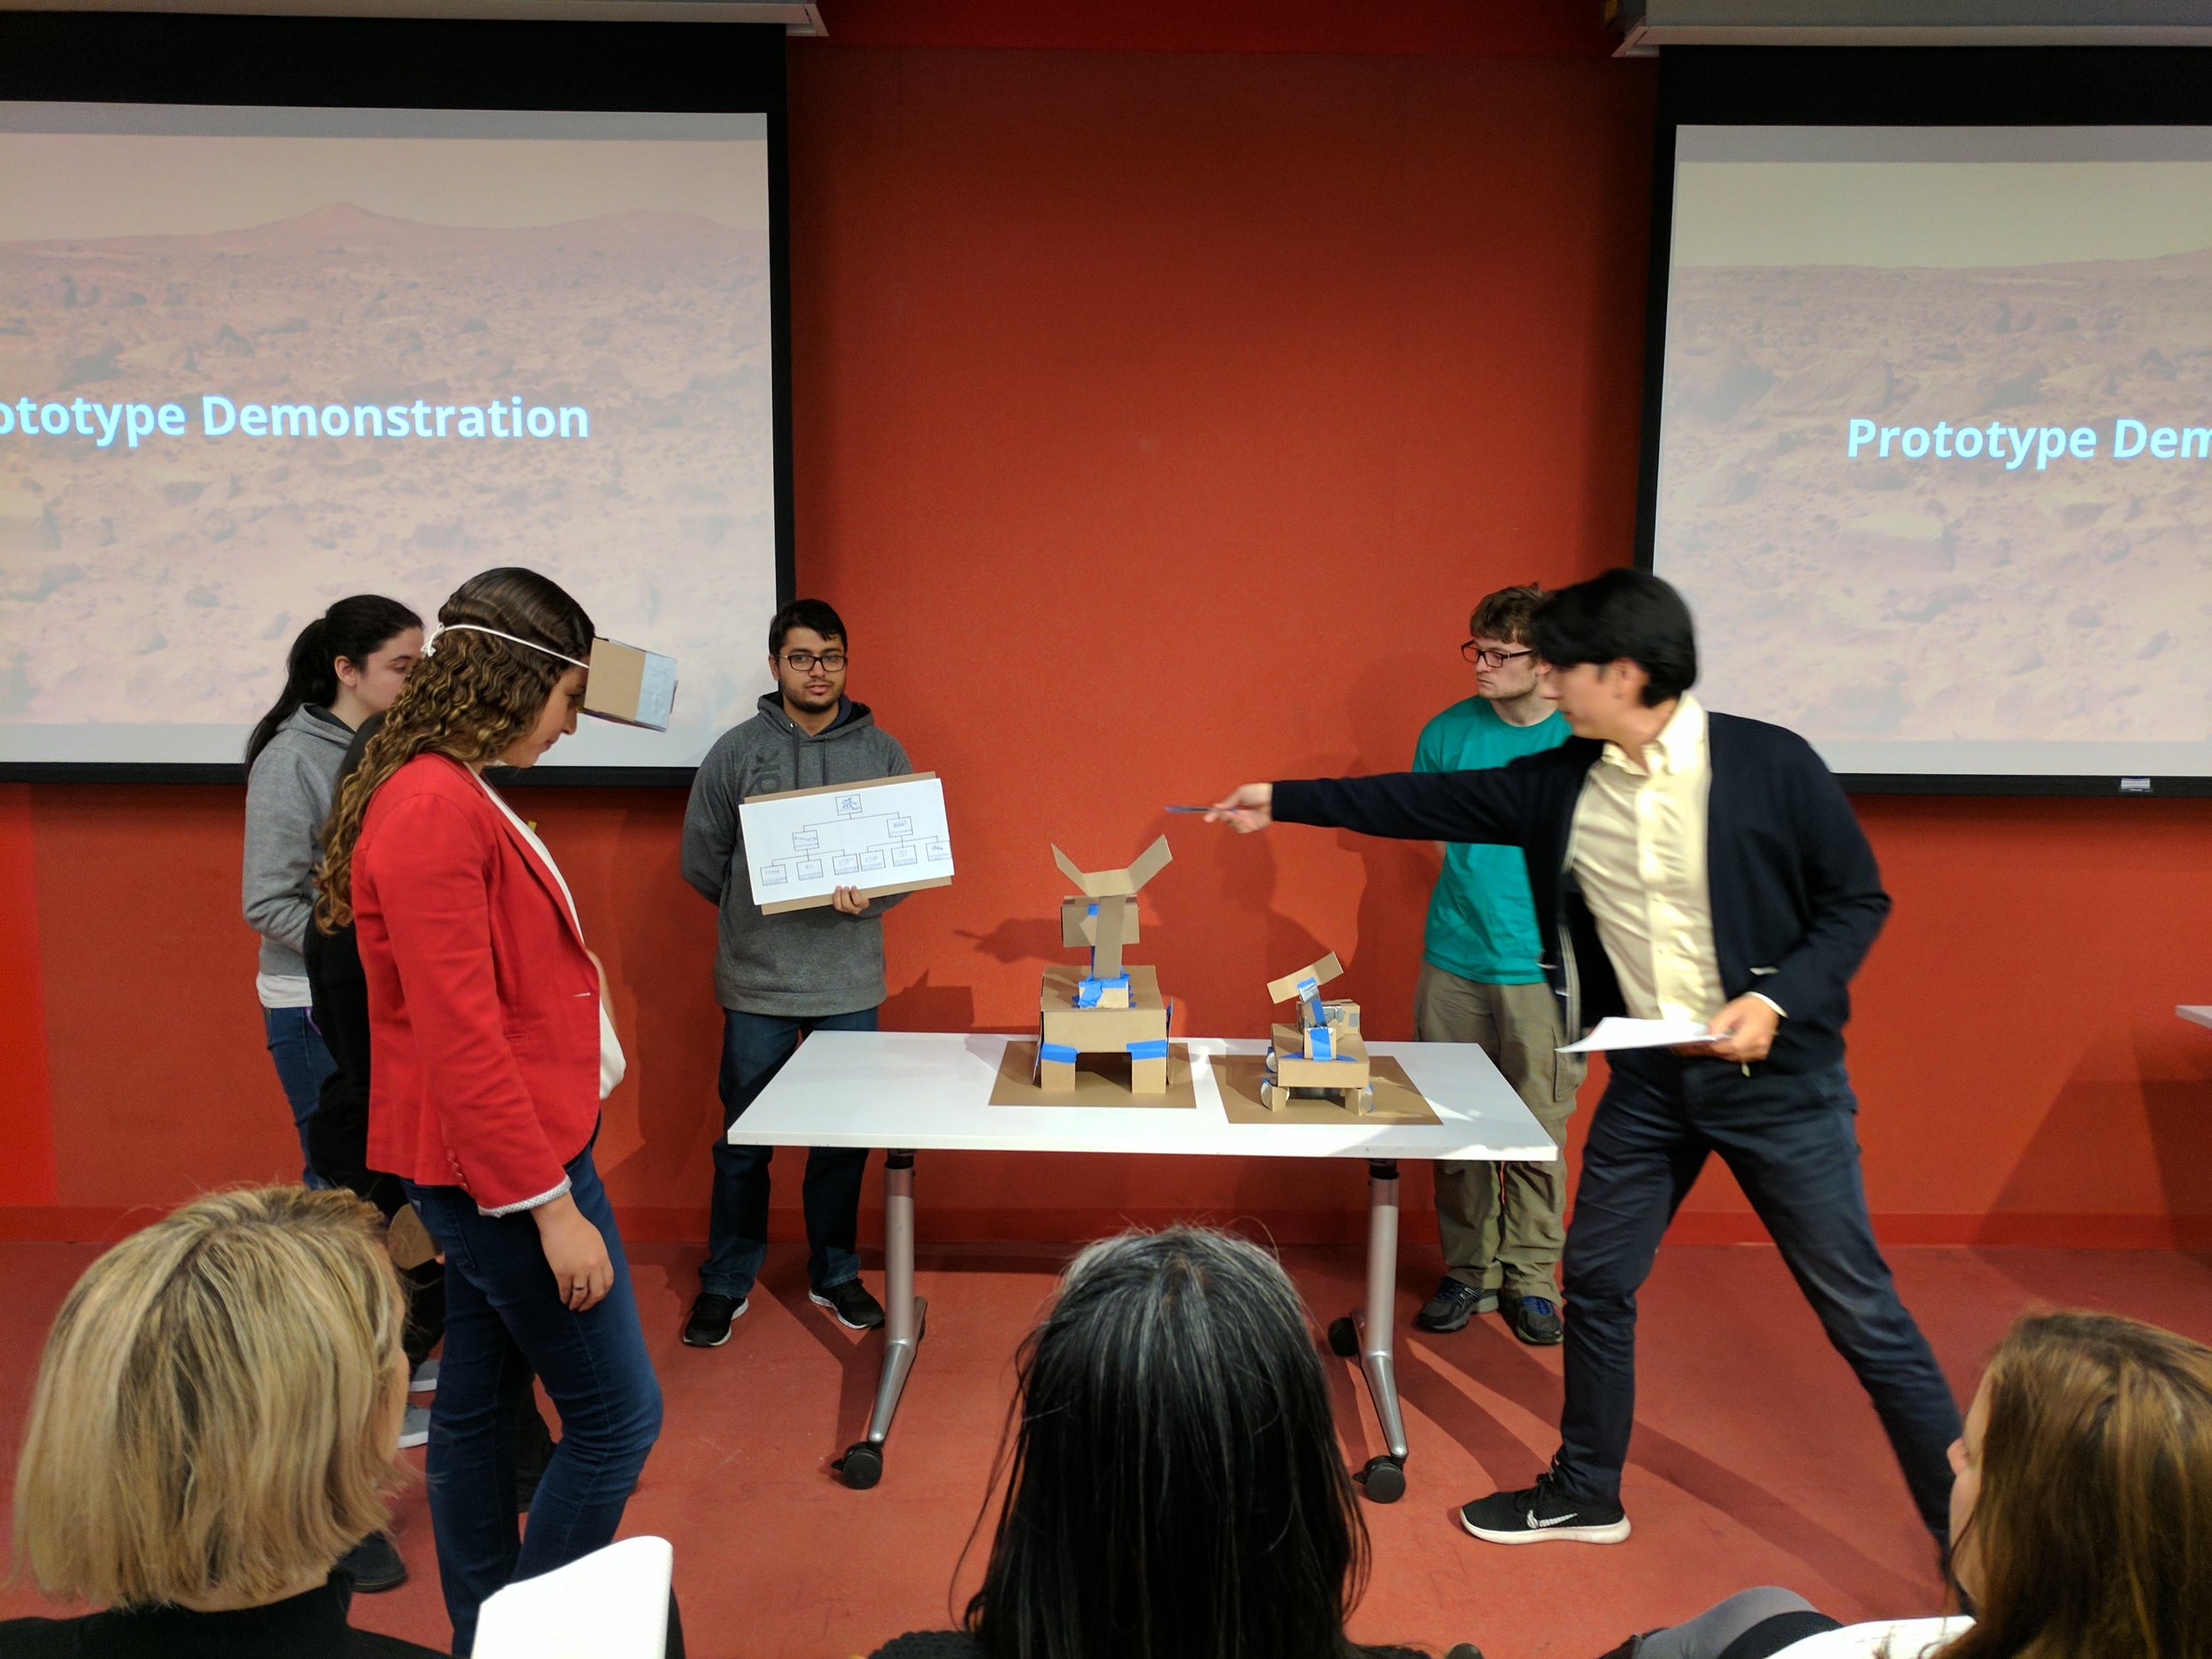
Our team presenting to the NASA JPL Ops Lab correspondents alongside NYU staff and UX designers in the New York City area

Team Ada Lovelace using all of their members to demonstrate their prototype
User Testing Analysis and Findings: We gave our users two tasks - to “select and pin the whole robotic arm” and to “select and pin a screw inside the robot head”
Based on user testing, we found a number of insights, prompting us to iterate on our prototype.
1. Most users found the NavTree extremely useful, and once they discovered it, they used it as their sole navigation.
2. Users had trouble knowing they were on the lowest level of the hierarchy.
3. Despite existing in 3D space, the users wanted the NavTree to be in 2D.
4. The more feedback, the better
5. Users liked the mini-Rover as feedback but preferred to use the map to navigate.
NASA Feedback: After presenting design, progression, and feedback to NASA and giving them a live demonstration of the tasks we gave our users, they were impressed by the physicality of our prototype and were fans of using the Hierarchy Map and Slider as a way to navigate through the parts. However, they pointed out that our prototype didn’t truly mimic what would be like to use this as the Mars Rover augment is the size of a car and our augment was considerably smaller. They pushed us to find a way to better simulate the scale of the Rover for our user testing and to see how that affects feedback. They were also skeptical of the mini-Rover being a useful augment and worried that it might clutter the FOV or be confusing if it overlayed over the large Rover.
Based on the feedback from our users and NASA, it was decided to focus find more ways to save space in the FOV. Our following brainstorming session focusing on ways to condense the Hierarchy Map and make icons that will enable the user to turn navigation augments on and off to save space in the FOV. While the NASA team was not convinced of the mini-Rover idea, we decided to keep it based on the fairly positive user feedback that we received. However, we did take in consideration their concern about the mini-Rover being confusing when overlaid against the larger model. This idea led us not only to put the mini-Rover in container with a semi-transparent background but to find more designed ways to create contrast between our designs and the large Mars Rover.
We also decided to create new names for our augments. The Hierarchy Map would be called the NavTree, the Slider was now named the Hierarchy Slider, and with the addition of its new container, the mini-Rover augment would now be referred to as the Explosphere.
Prototype #4: Explosphere, NavTree, and Hierarchy Slider
Materials: Google Tiltbrush and Slides
Main Role: Cleaning up the prototype and fine tuning its communication in the presentation

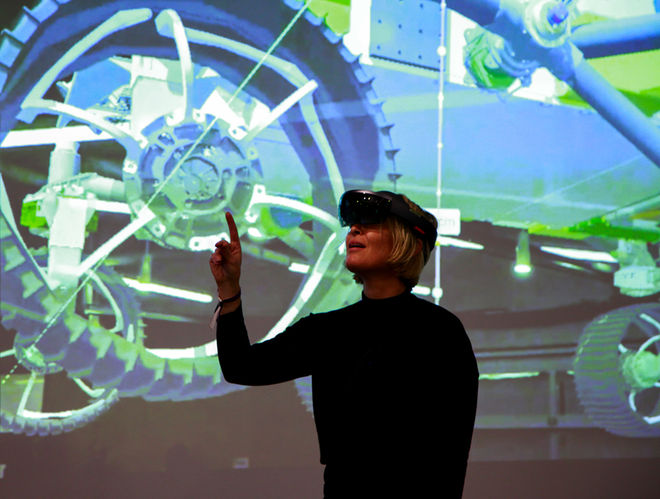
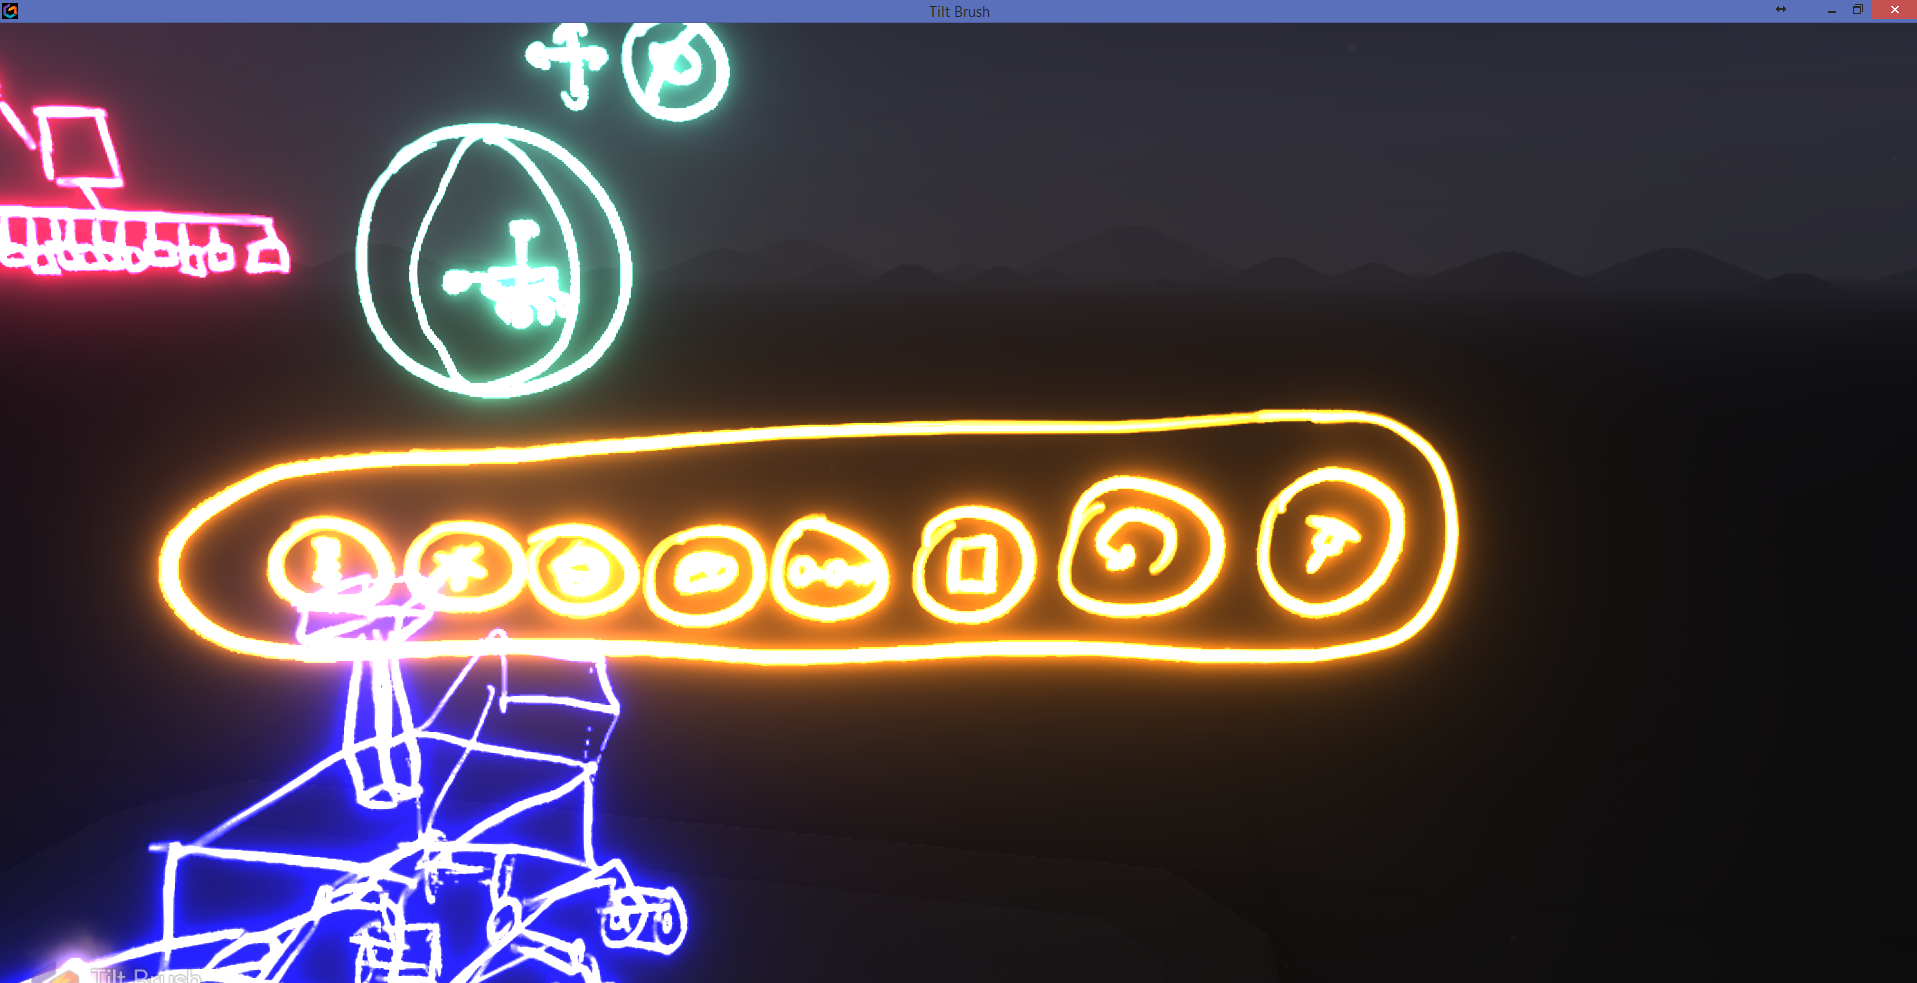
A still from our demo using Google Tiltbrush
At this point of the design stage, we were settled on our three final augments, the Hierarchy Slider, the NavTree, and the Explosphere. To save space on the Hierarchy Map, we decided to shrink the lower level icons and incorporate a magnifying glass that can be tapped-and-dragged to different areas on that level. We also begin adding the icons that would allow the user to hide the augments if they wished. Following the advice of a user who wanted more feedback, we also added a feature that would allow the user to see all of the parts that they have pinned. The team decided to try using Google Tiltbrush for this prototype as it could allow us to create a replica of the Mars Rover that was the size of a car without physical materials. We were also planning to export the files and create a virtual reality simulation. However, due to time constraints, we were only able to get still from the session. My main role in for this prototype was to fine-tune the communication of the stills for a presentation.
Results: Unlike the cardboard prototype, the Google Tilt Brush prototype was not well received by our users. While it did portray the scale of our designs in relation to the Mars Rover augment, the interactivity of the cardboard prototype was better received and gave more useful and clearer illustration of the experience. Had we been able to create the virtual reality experience that we imagined with interactivity and a more physical perception of the scale and position of the augments, the feedback would probably have been better - but this is a presumption. Moving forward, our next task was to find a way to communicate our design digitally for the NASA JPL Ops Team.
Prototype #5: Video Prototype
Materials: Video and images
Role: Leading the digital communication prototype, designating tasks to team, overseeing narrative, providing a style sheet and base of design, and communicating with the team members.
At this point, our Project Leader had to step aside and I was asked to step in as the Project Leader. Since our group had to find a way to communicate our design digitally to the NASA JPL Ops Lab Team, we all decided that video was a better medium to convey our ideas. From there, I began to designate roles and tasks and assigning an augments for people to creation action shots or stills that could be animated through gifs and also uploaded into a video editing program. I then coordinated with the team member in charge of editing and putting the video together and we broke down steps of the task of the demonstration together.
Results: The video and its accompanying communication website was more successful than the previous Google Tilt Brush prototype. Some feedback for the video was that the demo could have been repeated and that the text describing the scenario should have accompanied the movie on the same frame. However, after watching than once, users found the video fairly clear.
NASA Feedback: Even after our iterations, the JPL Ops Lab team was still not convinced of the Explosphere being a useful augment. They believed it to be unnecessary as the Hierarchy Slider and NavTree would be sufficient in the selection process. They also felt like the scale of our augments in relationship to the Mars Rover augment was still not accurate. They encouraged us to take this feedback for future projects in the case we ever decided to design more in augmented reality.
Conclusion
For a potential solution, the NASA JPL Ops Lab team was looking for a more practical and complete solution than what we presented. While the team agreed that the NavTree and Hierarchy Slider are similar to the solutions that their own team was brainstorming, the Explosphere took away from those proposals. Looking back, it would have been wiser to have discarded the Explosphere when the JPL Ops Lab team questioned it initially and for us to focus our efforts on the Hierarchy Slider and NavTree.
As a personal takeway, combining the physical interactions, experience, and space with these digital interfaces is a dynamic that interests me. I look forward to using my experience in designing for this intersection between the digital and physical in the future.